Page 1 of 2
Project list
Posted: Apr 13th, '11, 08:20
by JP Dalik
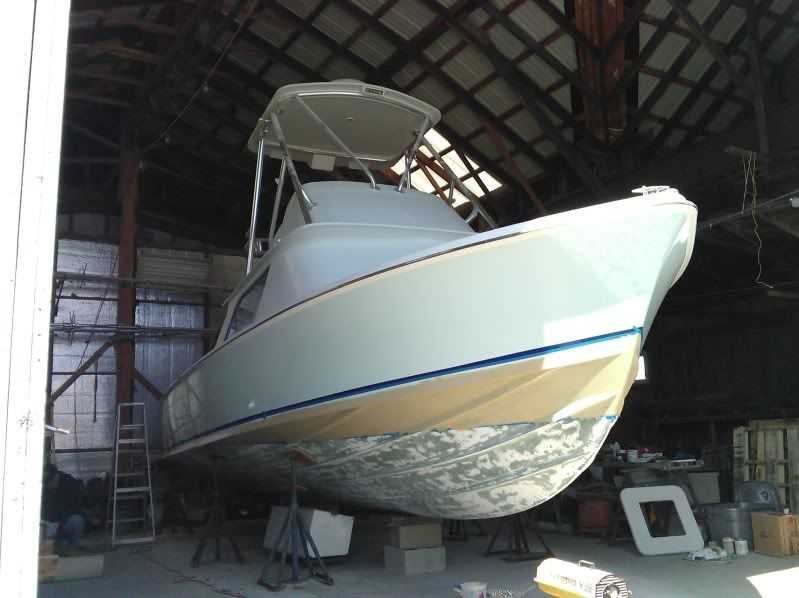
1. Sand blast, fiberglass and re fair bottom. Remembering to keep the chines square
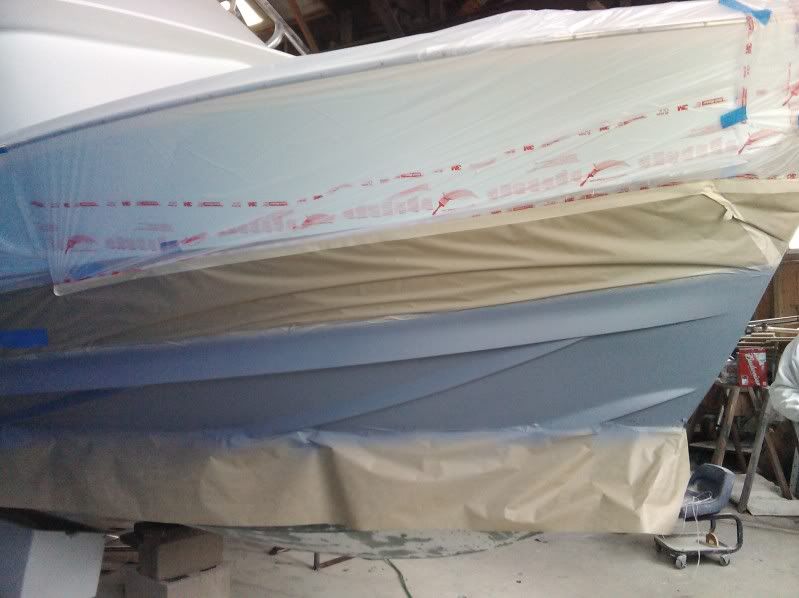
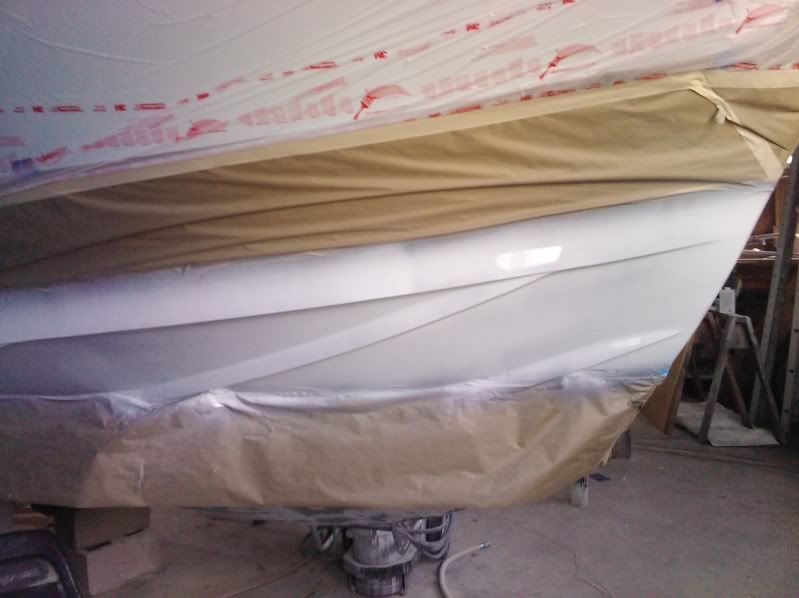
2. Sand and prep topsides for Awlgrip
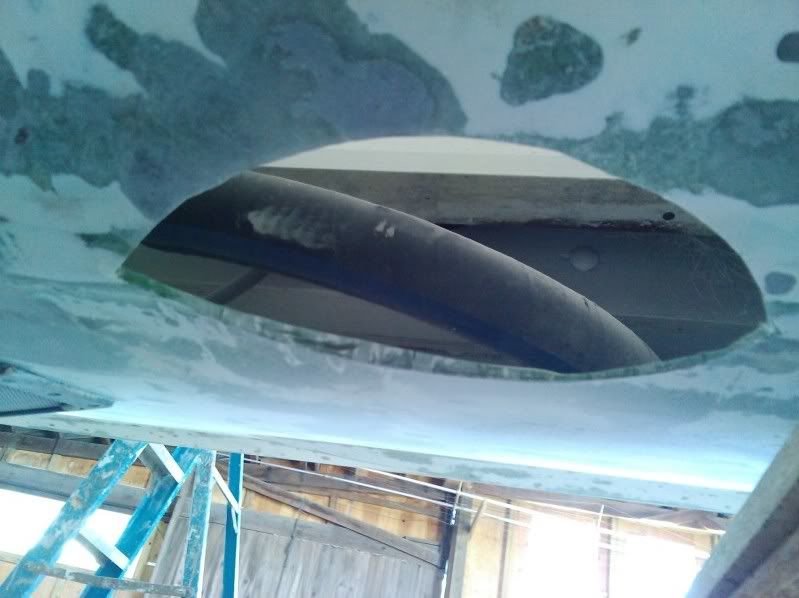
3. Remove bow hatch and cut for window gotta let light into the cave.
4. Remove bottom paint and refair under boot to lower paint line as per local delivered boats in late 70's keep boot in same location (high build on) Oh yeah reform chines to maintain nice straight lines.
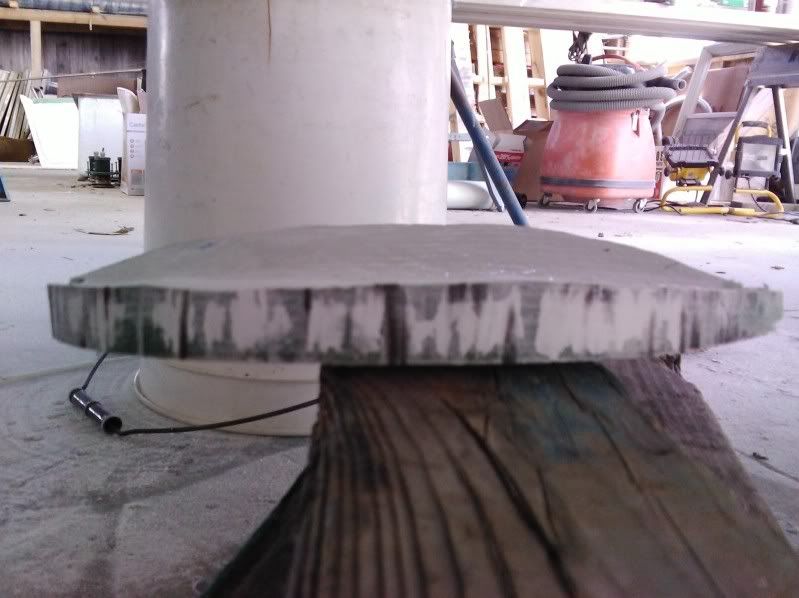
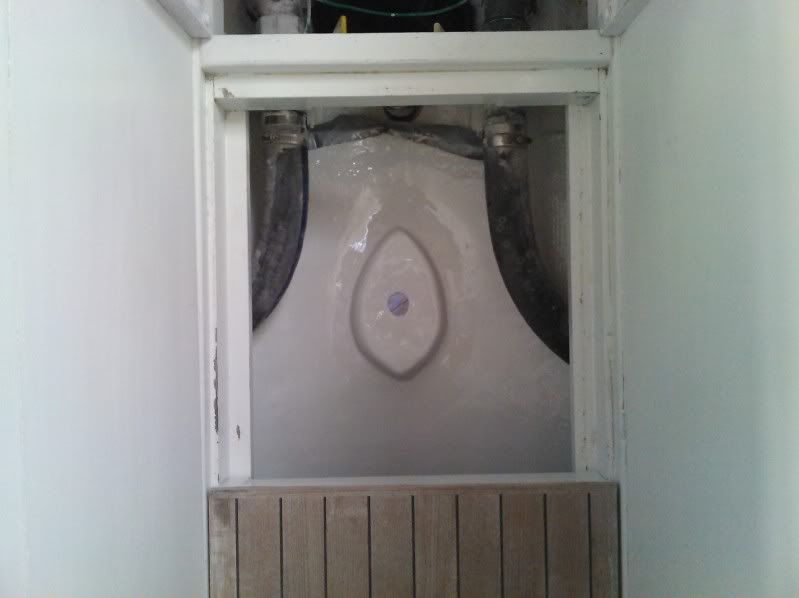
5. Make a mold for flush mounting Simrad CHIRP transducer- remember to put tape on ducer blank- vinylester shrinks
6. Cut a little hole in the bottom for ducer install
7. Hope to have all of it finished for Memorial Day.
8. Drink and celebrate
Posted: Apr 13th, '11, 09:18
by Bob H.
JP, Now thats a big hole....a transducer that big will show the eyelashes on those poor tuna...love the old school water line...step 8 is my favorite..Chimera is one slick looking ride...BH
Posted: Apr 13th, '11, 11:30
by Dug
JP! Love it!
Big hole!
that being said, that Chirp stuff is the bees knees!
For real!
Not yet time for an upgrade for me, or even a crossgrade, but I am watching it closely!
All part of the big plan for me sometime in the future...
Thanks for sharing!
D
Posted: Apr 13th, '11, 11:37
by Russ Pagels
Jp, the boat is looking real good. that is one large hole. Post some more pictures as the work progresses ...Russ
Posted: Apr 13th, '11, 12:14
by Harry Babb
Man! ! Thats a thick hull section.....looks like you are getting close.
hb
Posted: Apr 13th, '11, 13:39
by ZeroCavity
Hey JP, are you going with the white plexi or black on the hatch ?
Posted: Apr 13th, '11, 19:04
by Tony Meola
JP
Looking good. Please make sure you continue to post pics. We love to see the progress you are making.
Posted: Apr 13th, '11, 20:12
by bob lico
jp we both have to contend with same bootstripe problem. you mention sand down and prepare for awlgrip does this mean you have to repaint hull side or are you going to try and blend old bootstripe and gradually go up as you move toward stern. i am trying to figure a way to have the buddy boy stripe without destroying the hull side paint.
Posted: Apr 14th, '11, 07:24
by JP Dalik
Looks like the forward glass will be 1/2" graylite, wanted something we could jump on and have no issues.
Bob,
There is no boot stripe/hull side issue on this project. The earliest boats were delivered from the factory with a red or black boot line that followed the first hard chine, our local dealer would then put bottom paint on the natural waterline. It was a nice look so for our project the boot stays the in the same position and the bottom paint gets removed and lowered to the true water line. The biggest pain in the ass is working with the 12ft straight edges to get a nice horizontal line around all the f'n chines.
Step 8 has found its way up the ladder and is mostly used between each number now.
Posted: Apr 14th, '11, 10:39
by John F.
Nice project. The first part of Step 8 usually precedes, occurs during, and follows completion of the project or any part of the project. Gives me the courage to start and the drive to continue....and the ability to forget (or not clearly remember) what the hours of sanding or scraping or whatever was really like at the time.
Posted: Apr 14th, '11, 12:43
by JP Dalik
John you are correct; I think of Step 8 as the equivalent to a womans ability to forget the pain associated with child birth.
Its necessary in the continuation of the species/ or the project.
All projects from here on out should be 8 step
1. Purchase boat
2. Run boat
3. Structural repair/upgrade
4. Running gear repair/upgrade
5. Electrical rapair/upgrade
6. Interior repair/upgrade
7. Exterior repair/upgrade
8. DRINK AND CELEBRATE
If for some reason your purchased vessel doesn't run or you received a running boat without having to purchase it please proceed to step 3. I think this could be fool proof.
ALL HAIL STEP 8. This is not to be confused with any "12 step" program,,,,,, these are for those that have given up.
Posted: Apr 14th, '11, 13:19
by Capt. DQ
JP,
Step 8 has found its way up the ladder and is mostly used between each number now.
- yEP! You got that right JP! Weee's be Cobia fishing down to Destin and back this weekend. We're definitley gonna be Step 8 when get there Saturday afternoon.
DQ
Posted: Apr 14th, '11, 14:02
by TailhookTom
JP:
12 Step program = a quiter, and any bunch of people that take 30-50 year old boats and do what we do to them -- well, we aren't quiters!
Step 8 - might be a good boat name!
Posted: Apr 14th, '11, 20:26
by Tony Meola
JP
Ours came out of Nautical Yacht sales up in Brielle back in 75. The bottom was painted all the way up to the hard chine. No glass showing below the chine.
Some times I like it that way, others I like it with the glass showing. Depends on the mood of the day. The dealer said that it was painted in Florida before shipping. Don't know if they really did that but all of the 31's he had were painted that way.
Posted: Apr 26th, '11, 08:32
by JP Dalik
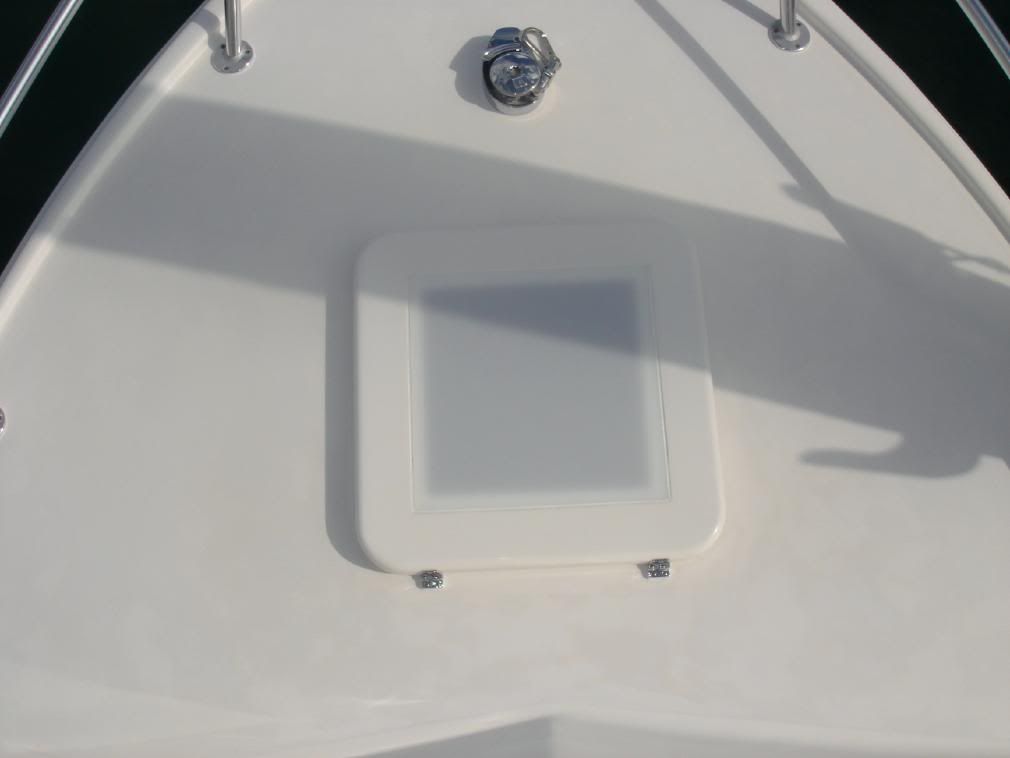
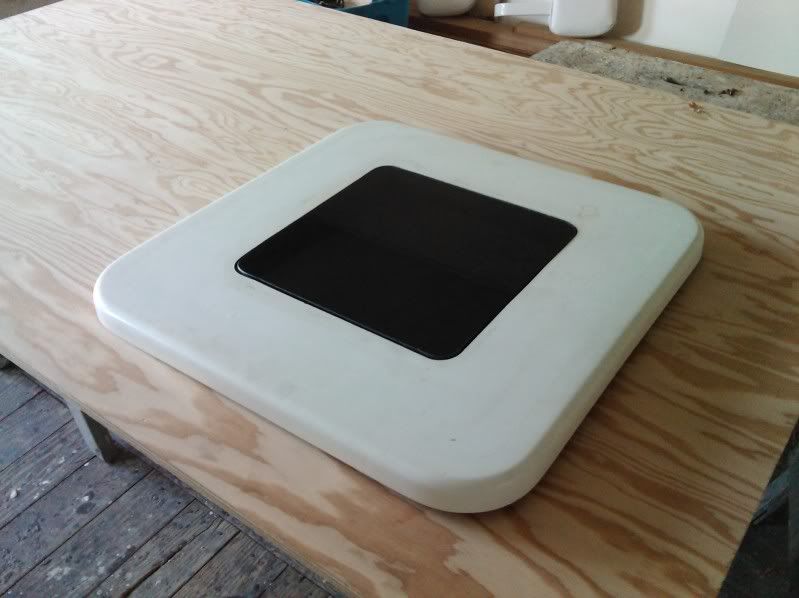
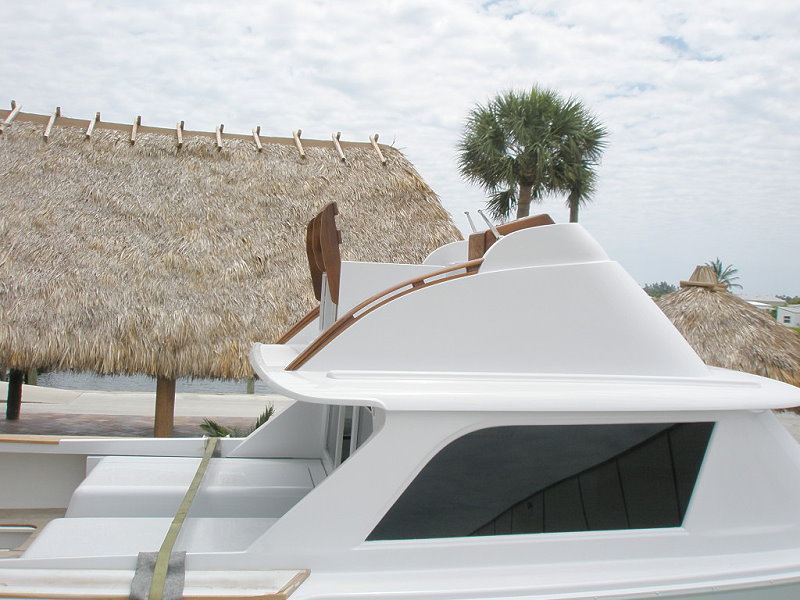
Bow Hatch, 1/2" Greylite
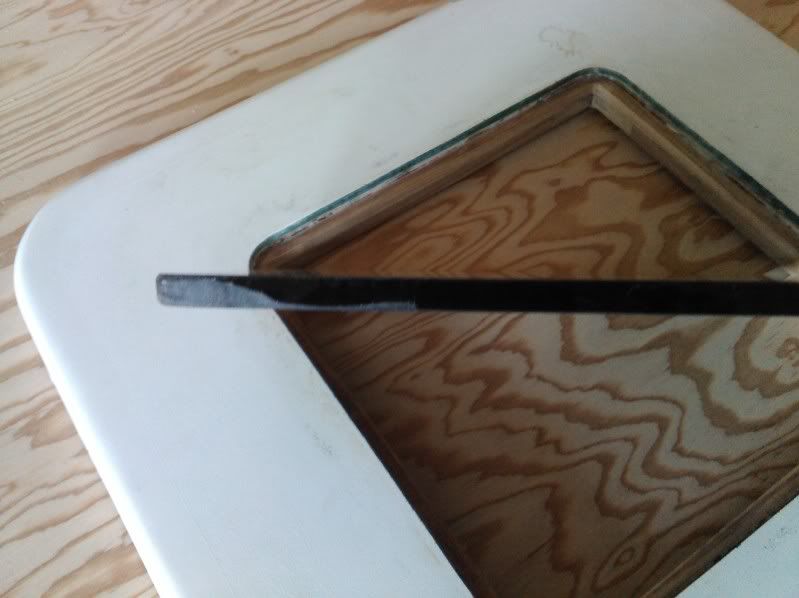
With Glass Installed
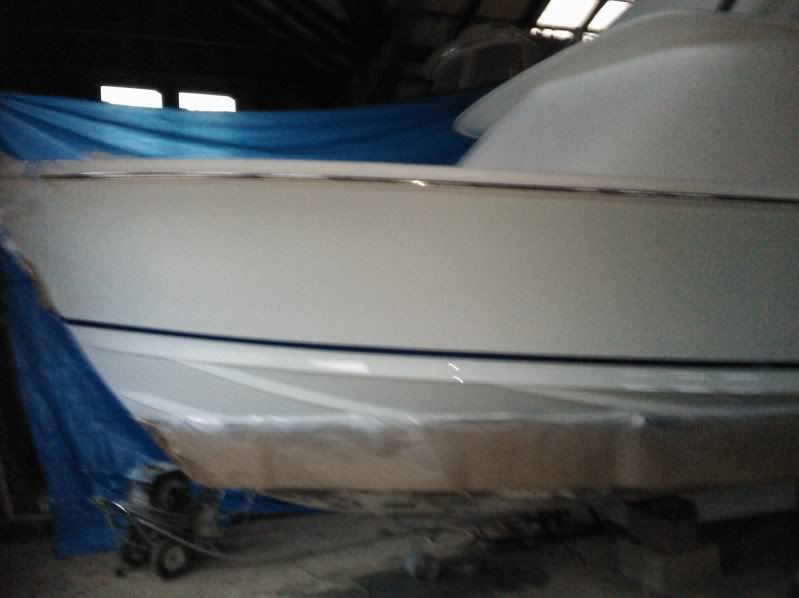
Exterior
More to come
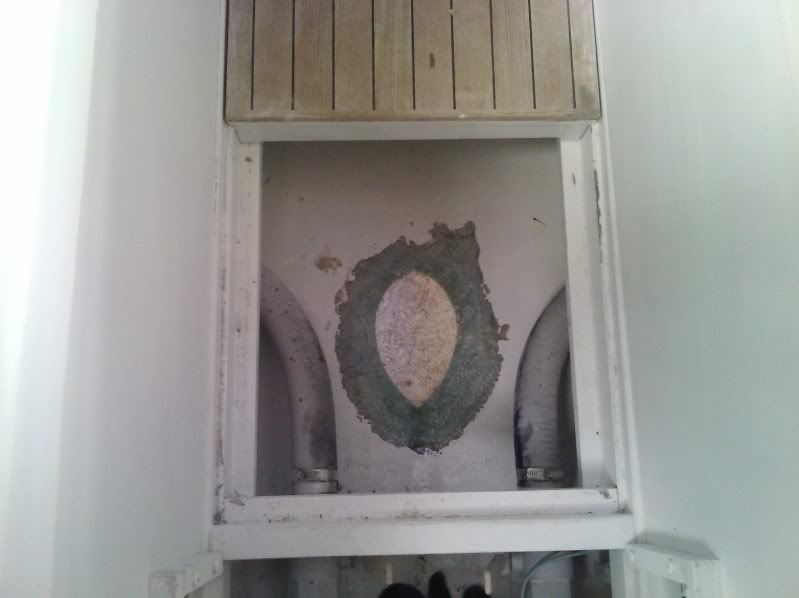
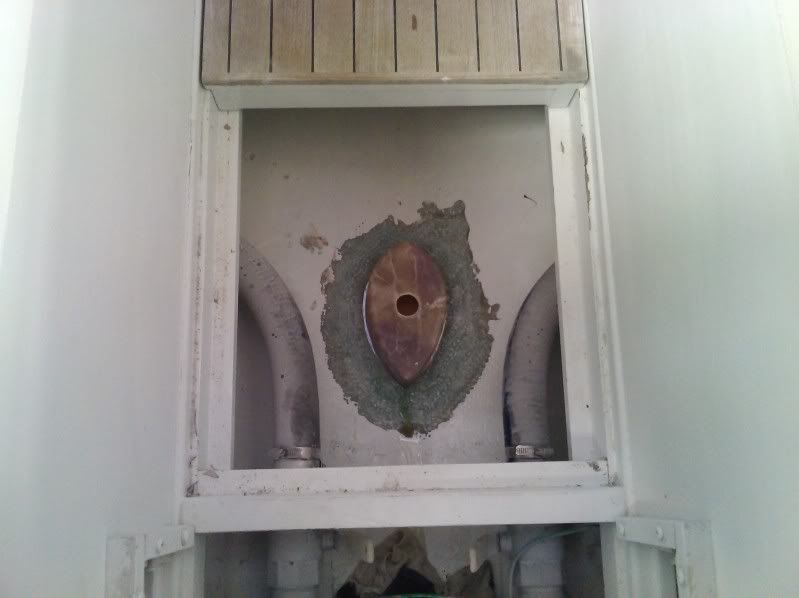
Transducer Finish Interior
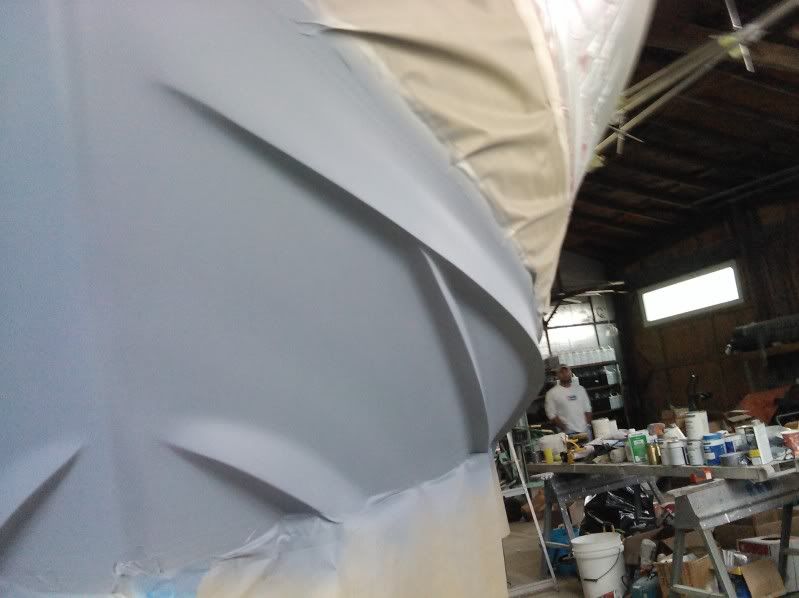
Hull Primer- finish coat tonite
Posted: Apr 26th, '11, 10:00
by Russ Pagels
JP,looking good, very good. I wish that I could do the kind of work that you do..Keep the pictures comming....Russ
Posted: Apr 26th, '11, 10:47
by Craig Mac
front hatch looks great---please advise how you handle the screw heads for all the hardware of the hatch---on my original hatch the heads are all visible on the top side---it is painted with sand finish--that hides it well.
Posted: Apr 26th, '11, 11:13
by JP Dalik
Craig,
Thanks
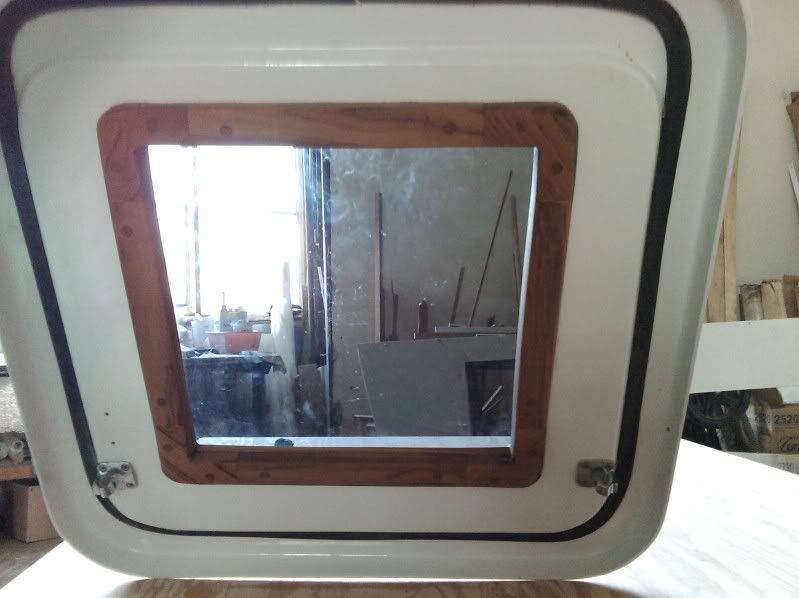
Just another one of those 5 minute jobs.
When we first did the boat we ground the inside of the hatch and epoxied a piece of 1/2" marine ply to the bottom. This was done so we would be able to remove the buckshot effect from all the hardware attachment points. The Hardware is mounted to this plywood.
Posted: Apr 26th, '11, 11:54
by Capt. DQ
Damn bro, thats looking good. Better hurry up and get some blood on that thing soon. Already done bloody up the Short Circuit.
DQ
Painted Last Night
Posted: Apr 27th, '11, 06:52
by JP Dalik
Prep
Tack Coat- little heavy had an issue with the gun
2nd Tack Coat 30 minutes later
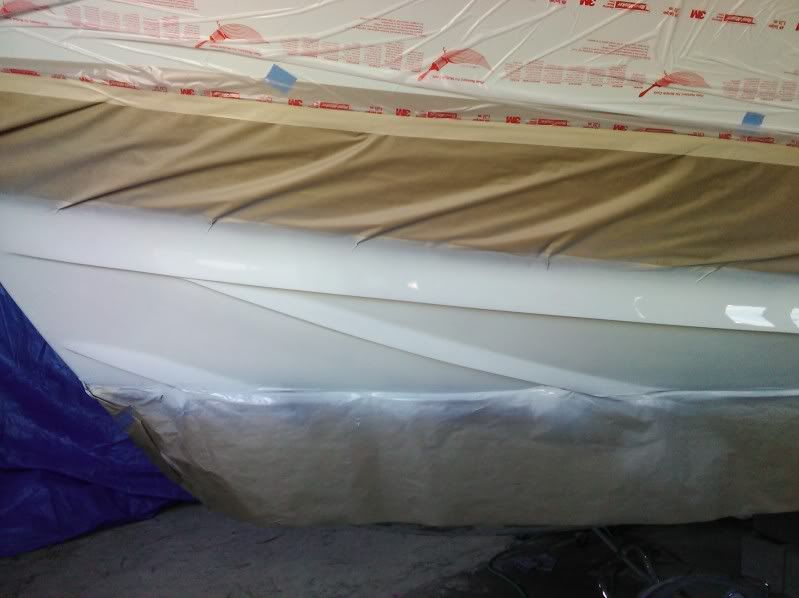
Finished 35 minutes after that
Starting to figure this HVLP gun out, lot less stuff in the air for sure sorry for the crappy cell phone pic
Posted: Apr 27th, '11, 07:12
by bob lico
jp i notice the professional mask off for the paint work. did you do all the work yourself or is this a boatyard building/project? just wondering because for me to do paint work in maintenance building it becomes major ordeal with boats coming in and out every day.always wondered when i notice the teakwork on the curve of the coaming board at the transom. probally take me two weeks to make those curves on port and starboard and a hell of a big piece of teak.-----------future project for me!
Posted: Apr 27th, '11, 08:14
by JP Dalik
Careful with that "Professional" word people will get the wrong idea.
Paint and prep is all my partner and I along with allot of step 8 during the process- each coat is a celebration
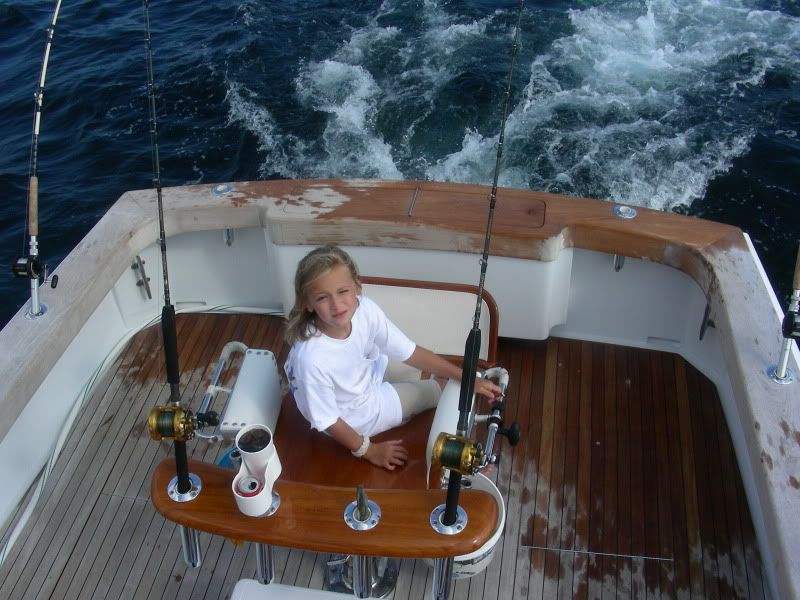
The Teak boards are cut by Professionals, single miter corners on a compound angle- no thanks we have Roger Fritz for that.
Posted: Apr 27th, '11, 08:36
by bob lico
sorry jp i did not explain myself not the teak covering boards i am talking about the teak under the covering boards normally called coaming boards. those courners where the transom meets the port or starboard sides have a curve that is probally beyond my ability as i see it unless someone was to show me how it is done . i know some boat builders steam the wood and bent it in layers while others just laminate multible pieces . a lost art in this country -------wooden boats.
Posted: Apr 27th, '11, 08:53
by JP Dalik
Yeah that corner was a surprise for Roger- I think he just about shit when he saw how long it was. Its done like the rest of the turns in the coaming. Out of solid chunks of wood.
He does some great work.
Posted: Apr 27th, '11, 17:09
by bob lico
both your dauther and that coaming are stunning way beyond the ability of even a good wood boatbuilder. this is real speciality work and not a whole lot of these people are around.
Posted: Apr 27th, '11, 17:20
by tunawish
J.P. ....Teak work looks fantastic.. still trying to appreciate that "NJ smile" on the waterline vs chine thing though.. My buddy in NJ had the same thing.. he had a boat on LBI just inside Barneget Light.... every time i saw it I gave him crap for it......yet I did the same thing on a whaler I restored..the original bottom paint came to the top of the whaler smile .. but that was extreme... what a pain it was to remove the bottom paint and restore the gelcoat..
Bob .. We bend stuff all the time .. cutting from a solid chunk will reveal end or side grain at some point in the curve..absolutely no issue on a boat but not good for furniture .. We use very thin strips made in our timesaver to exactly the same thickness about 3/32 depending on material and grain direction.
We can make them up to 36" wide.. Real key for us is very sturdy male / female molds to layup thin strips and epoxy glue..
Another method for tall curves like JP's coaming is to glue up vertically 3/4" thick segmented sections in a mold to get the rough shape/curve...Rough sand to knock down corners.. hand plane and scrape as we did below to get final true arc.. These below were elliptical... which made it even more fun.. 30" tall solid walnut

[/img]
Sorry haven't figured out how to resize pics yet...
Ray
Posted: Apr 27th, '11, 19:07
by SteveM
The teak deck and other work is amazing. Great job.
Posted: Apr 27th, '11, 19:27
by Bob H.
Love to see true woodworking craftsmanship...Jp lower waterline is growing on me....Ray thanks for those pics and "how to" on those radius corners...how big of a solid block did you need to make such a corner???BH
Posted: Apr 27th, '11, 20:20
by Tony Meola
"JP Dalik"
Yeah that corner was a surprise for Roger- I think he just about shit when he saw how long it was. Its done like the rest of the turns in the coaming. Out of solid chunks of wood.
J P
I guess Fritz forgot what his former 31 looked like.
Never saw it but I heard it had some inovative features. Someone told me he built some type of a protusion, actually they called it a wing, to knock down the spray.
He does have a great reputation. I saw a repair he did to a boat that had a fire. You would never know the boat was fixed. A true craftsman.
Posted: Apr 27th, '11, 20:27
by tunawish
Bob H .. We didn't use a solid block as J.P. but as a rule if you need to make a 90 degree 6" inside radius then at least that... plus the thickness of the material... If outside radius .. don't need to add material thickness to block...
Inside radius....a big drum sander will be handy to finish off..
Outside radius... a belt sander will work with a controlled and constant up/down while pivoting on outside corner movement, to your pencil line..
Sorry for overdoing it... after the work I've seen you do, I'm sure you get it..
Like I said any of you guys are welcome to stop by and use my shop equipment if in the area..
Makes these things easier to do...sometimes a 60 min drive can save you hours of screwing around .....
Ray
Posted: Apr 27th, '11, 21:52
by bob lico
lets start out with the idea of a chunk of teak. i have never even seen teak offered in this form like a 10" by 10" piece! i guess in a situation where the covering board overlaped the coaming board so you could not see the laminates unless you layed on your back in the cockpit and looked up at the S turn like the inside corner where the transom coaming meets the live bait well . amazing what a education i received today----thank you tunawish, very considerate to post pictures.
Posted: Apr 27th, '11, 23:14
by JP Dalik
Tony;
There are actually 2 Fritz's
One is the king of all things wood and that is Roger
The other is the king of all things fiberglass and that is Billy- he also has the 31 Bertram Finest Kind, aqua mist hull white boot with waterlined bottom paint full tower.. its nice.
Funny thing two guys with the same last name not being related. I was confused for years, especially when I met a girl named Kathy Fritz that as near as I could tell wasn't related to any of them........... Like Smiths or Johnsons I guess.
Posted: Apr 27th, '11, 23:25
by JP Dalik
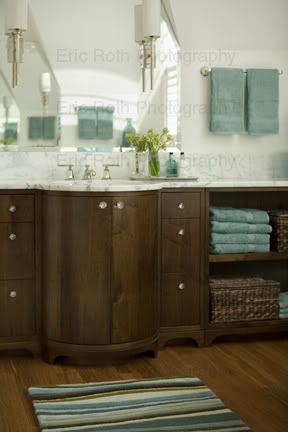
Ray,
That's some crazy bathroom there. Neat stuff the way the wood flows to match the ceiling and such.
Yacht stripe always looks nicer than following the chines, just something about a taller bow. But its allot more work- 18 ft straight edge 3 people and a pencil, remember the straight edge gets held only on a vertical never following the hull angles.
Posted: Apr 28th, '11, 07:21
by Bruce
Very nice job JP.
I always enjoy the extra mile taken to do a top quality job, it shows.
Posted: Apr 28th, '11, 07:59
by tunawish
Bob .. The chunk of teak has to be glued up from thinner pieces to the desired block size... The end grain will show on the face as you cut through the various pieces to form the curve.....vs if bent, the same face piece is the only grain showing...again on a boat not a huge issue....
J.P. That whole house was done with no regards to cost..that light fixture in bath was $10k from Italy.. it made it into a couple national magazines, that's why pics had watermarks.... Architects photographer wanted $500 each..
We kept the copies with/watermark...and can't use it for advertising.....
Ray
Posted: Apr 28th, '11, 08:14
by bob lico
tunawash endgrain would be a issue with me. my covering boards reflect this problem. when i layed out the boards i notice a 45 degree miter would put the hawes pipe in the middle of miter so i made a fancy double miter with a good size piece in corners to insert hawes pipe. now i have endgrain showing on in and out of those pieces which turn black and no amount of wood bleach will remove. live and learn i guess. next time steam bent on the subject; did you ever notice one of the trademarks of rybo that is a short teak two piece railing that follows the contour of the bridge sides of the bridge. i always wanted that look but could not figure out how to bent the teak .now i will be pestering you for a step by step procedure i belive the 31 bertram called marlin had that done . anyways i loved to do this winter.
Posted: Apr 28th, '11, 08:41
by tunawish
Bob, Sometimes you can't avoid the end grain, like on those flat corner pieces....
After seeing what you, J.P, Capt Pat and others have done, I certainly don't profess to be close to an expert on here.... but any time I can offer a different point of view or method.. more than happy to help...call anytime
Ray
Posted: Apr 28th, '11, 09:25
by Craig Mac
Bob,
The boat that has the Rybovich style double bridge rails is the WAHOO---and the poster is Marlin.
I saw the boat over a year ago in process--should be complete by now --would love to see photos.
Posted: Apr 28th, '11, 10:19
by bob lico
thanks craig now we both want to see finish product . foutunately i have a rybo 1957 vintage 43' to copy from. really a sharp look definitely sets the boat off as the best boat ever built with all due respect to rybovich
Posted: Apr 28th, '11, 10:24
by CaptPatrick
...a short teak two piece railing that follows the contour of the bridge sides of the bridge.
Pretty easy really and requires no lamination or steam binding... Since the curvature is fairly shallow, and the thickness of the wood strips are 3/4" or less, wet bending is a suitable substitute for steam bending.
Cut the four strips about 3" longer than will be needed, round over the long corners with a suitable router round over bit, (radius = 1/2 the thickness of the strip).
Make a poly tube using heavy weight black plastic sheeting and duct tape. Make the tube large enough to loosely contain the 4 strips and about 1 foot longer than the strips.
Insert the strips, roll and tape up one end of the bag, fill with water, roll and tape up the remaining end. Leave it in direct sunlight for a full day and over night. The wood will soak up enough moisture to make it pliable enough to form the shallow curves needed.
Work the base strips first, keeping the top strips wrapped and wet.
Configure and screw the base strips to the boat. Screws placed where the standoffs will hide them. Allow the strip to fully dry, screwed into place.
Make up the 6 standoffs, drill and screw into place on the base strip.
Configure the top strip, (still wet), and screw onto the standoffs. Let them fully dry.
After a couple of days of drying, disassemble the parts, sand all parts through 360 grit and re-assemble off of the boat, making sure that all of the screw holes re-align as the were on the boat. Check for fit on the boat.
When satisfied that the fit is good, epoxy and screw the pieces together. The bottom strip will be screwed, (counter sink for a flush surface), from underneath up into the standoffs. The top strip will be screwed from the top, through both the standoffs and the base strip. There will only be three to four screws on the top strip which will be countersunk and bunged.
Initial varnish work will be done in the shop.
For the base varnish work, use through bolts and leave the bungs out. Once all the initial varnish work is done, remove the through bolts, chase out the bung holes, & install the railing on the boat with screws. Use a bedding compound between the wood and the boat. Insert the bungs very, very slightly below the top surface. Scuff up the varnish and do your finish varnish with a minimum of 4 coats.

Posted: Apr 28th, '11, 12:06
by Charlie J
thats nice, and sounds easy to do, even i could do it.
Posted: Apr 28th, '11, 13:43
by tunawish
CaptPatrick wrote:
Pretty easy really and requires no lamination or steam binding... Since the curvature is fairly shallow, and the thickness of the wood strips are 3/4" or less, wet bending is a suitable substitute for steam bending.
Bob, ....Well there you go ..and Capt Pat gives you pretty sketches that I can't... Way more talent on here that I could ever hope to learn....
Ray
Posted: Apr 28th, '11, 13:46
by PeterPalmieri
bob lico wrote:thanks craig now we both want to see finish product . foutunately i have a rybo 1957 vintage 43' to copy from. really a sharp look definitely sets the boat off as the best boat ever built with all due respect to rybovich
You are very fortunate, there are very few boats as "pretty" as a Rybovich.
Posted: Apr 28th, '11, 20:24
by Tony Meola
JP
I always thought they were brothers. Good to know.
Posted: Apr 29th, '11, 00:51
by JohnCranston
JP,
I'd sure like to check out your work the way us blind folk do...with the finger tips. Any chance that your crew will be in Greenport this year? What kw transducer are you going with? Are you mostly needing to find the bait?, or tuna? I'd sure like to check out that teak...After feeling the workmanship on Tommy and Bob's rides,last year, I'd like to see what ya'll did on the transom corners.
Thanks.
John.
Posted: Apr 29th, '11, 06:50
by bob lico
thanks captain the illustrations can walk me right thru it .that is a tough place to put screws in from underneath . going to wait till this winter jusr to take down the port side cabin ceiling---again!
Posted: Apr 29th, '11, 06:59
by tunawish
Bob, The screws from underneath are to only fasten the pieces together to each other .... then the whole assembly is attached to the boat from above then bunged
Unless i read it wrong..
Ray
Posted: Apr 29th, '11, 07:41
by bob lico
ray i have avoided the use of bungs since day one on my boat. i even installed my covering boards in one piece into expoxy then fasten with screws from under the gunnel. i have built the cabin interior so far with no screws or bungs showing, just my particular choice. i hate the original " machine gun" fastening of the original teak door jams , ceiling teak borders and fiberglass to bulkhead joints. slowly redesigning the interior with no screws showing anywhere. ray lets take areas like the head ,there is a aluminum strip seperating the head fibergrass insert from the galley/ head bulkhead .ok first you would remove the " idiot strip" thats the name for alluminum border trim on a bertram now you replace with teak strip with good buildup of varnish. between you and me if i had to remove the bungs i have destroyed the piece why not just use PL or what ever! make it permanent no need to ever remove that trim.i will make these pieces without any expose screws or bungs.
Posted: Apr 29th, '11, 08:21
by tunawish
Bob, If you have access from below, I would do the same .. unless the curved piece still requires a nut from below to keep wood from pulling out screw.... For me where I always oil my teak, I countersink flush and install from above with no bungs.. I don't mind the look of the fasteners if they are done neatly.. every fall takes me 20 min with a screw gun to remove the most teak I've ever had on a boat ....re-oil during winter in shop.... No masking fiberglass.... but that's just me... plus I haven't had a boat with enough teak interior to consider varnish
Ray
Posted: Apr 29th, '11, 08:45
by bob lico
i oil the covering boards for obvious reasons but up on the bridge which is protected from the sun ,like the pod i use varnish and then covered with awlgrip brand awlbrite clearcoat a four part mixture that has held up like the day i installed it seven years ago . again it is protected with dashboard cover within the semi enclosed bridge .