One Offing a Composite Water Tank
Moderators: CaptPatrick, mike ohlstein, Bruce


Like hell you will!scot wrote:OK so I quit.
Ray,tunawish wrote:Capt. Pat,
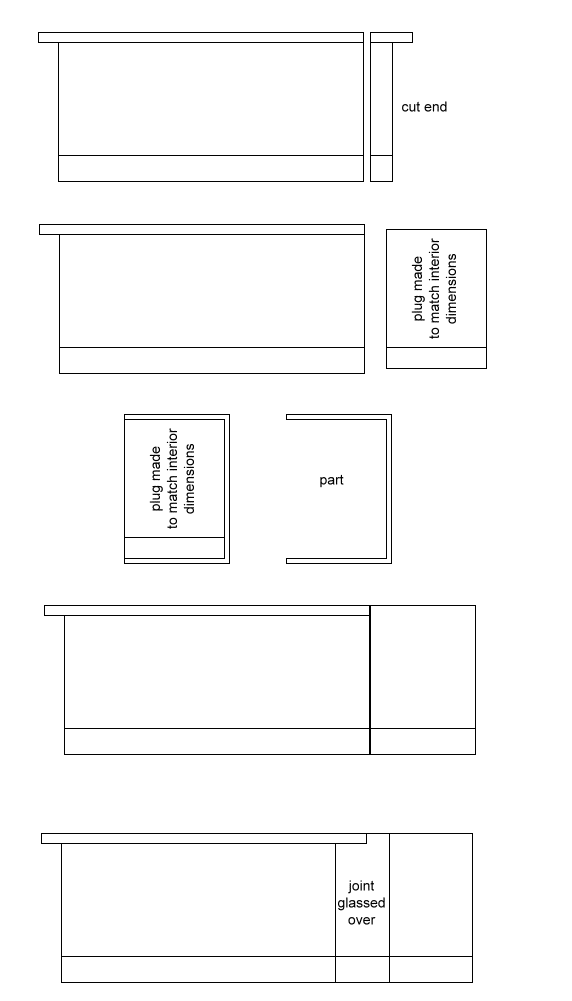
How many hours did that take including layout from start to finish.?
Thanks Tommy... Rain has still been in short supply but not too bad. We usually get a fairly consistant wetter period in the fall so things green back up. 6 weeks ago the landscape was getting pretty brown and trees even dropping leaves. The summer was hot and bone dry... Looks like we'll get another wet event in a couple of days.Tommy wrote:Patrick,
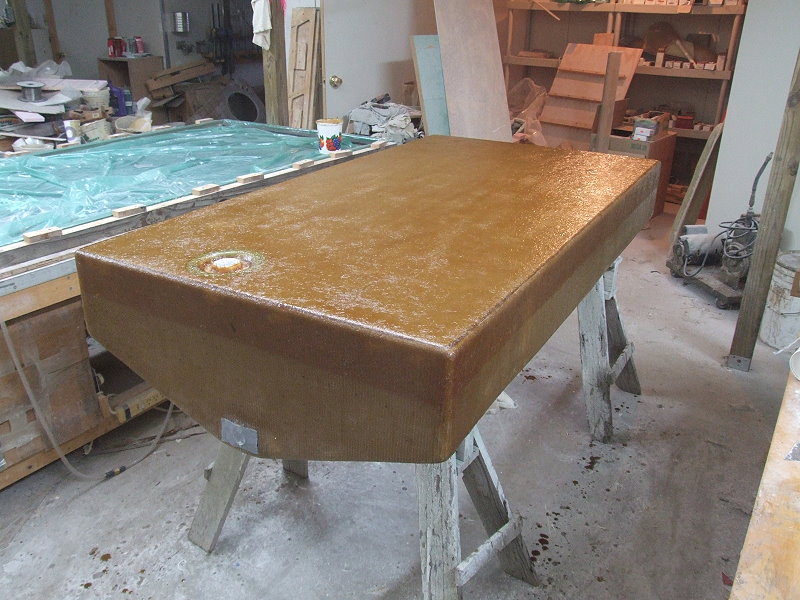
You never cease to amaze me; that series of photos on the construction of that tank is nothing short of amazing. It occurs to me that given enough time (and funds), that you could build a 31 Bertram from scratch. By the way, the yard at your home/shop looks great; must've had plenty of rain this year.
Tommy
Bob,bob lico wrote:i have a small annoying leak in my fresh water tank so i mines well dive in. i want to increase the overall lenth 6" and i feel that will suffice. should be about 23 gallons i guess from the original 18gallon. two questions ; i have 3/4" coosa board on hand but don`t know where you aquire the baffle board can i use 1/2' azek with the proper azek glue? i will use epoxy because i also have a ton on hand.
Users browsing this forum: Google [Bot] and 100 guests


