Bertram31.com
Working With Two Part Expandable Urethane Foam
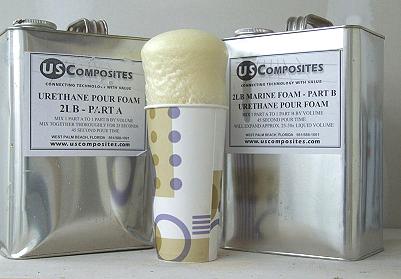
2 part expandable urethane foams are available in several densities from 2 lb per cubic foot insulation foam, which cures with a large amount of air trapped within the cells, through 16 LB density per cubic foot which could be used structurally.
Urethane Pour Foam Overview
- This two part liquid, expanding rigid urethane foam
is a closed cell, pourable foam, which will resist the absorption of
water.
- The densities shown refer to the weight per cubic
foot of expanded foam (12" x 12" x 12").
- Once fully cured this foam can be laminated over
with any type of polyester, epoxy or vinyl ester resin without melting.
- This product can be poured in multiple layers with
excellent bonding between layers.
- All expansion rates and times given are temperature
critical. Temperatures below 75 degrees F will lower the expansion rate
therefore requiring more foam. Ideal working temperature is 75 to 80 degrees F
or above.
- Accurate measuring of these products is extremely
critical.
- Working time before foaming: approx. 45
seconds
- Time before full expansion: approx. 5
minutes
- The lightweight foam is commonly used for filling
voids, filling under decks and practically any other flotation or insulation
application. Higher densities are used for architectural castings, support
applications and has virtually an unlimited number of potential uses.
In the following example, I'm using 2 lb density to insulate one of my livewells...
Before you jump into 2 part expandable foams there are some things that you need to know so that your project goes smoothly and gives you the best results.
First, the expansion rate for 2 lb density foam is about 25:1 - 30:1 One ounce of mixed foam, before it starts expanding has a volume of 1 cubic inch. Fully cured, the volume will be about 25 - 30 cubic inches. As the density increases, so does the expansion rate. 16 lb density only expands 4 times it's liquid volume.
The next thing you must be aware of is the blinding speed with which the foam starts reacting when the two components are mixed. You only have about 45 seconds to thoroughly mix & empty the pot. The mixing ratio is 1:1 & must be completely done within 20 seconds, that only leaves you 25 seconds to pour...
The expansion stage takes about 5 minutes, but the the cure to hard is around 15 minutes. It's best to allow at least 10 minutes before making the next pour. If the temperature is below 80° F, the expansion will be less than complete & the cure to hard will be longer. If you have to work in temperatures less than 75°, use a space heater. Ideal temp is above 80°...
When pouring the foam into a confined space, there must be enough space to contain the entire batch being poured & also enough opening for any excess material to expand out of. Over filling without ample relief openings can severely damage your project. DO NOT pour the foam into any void that is faced with glass. The glass will likely shatter from the pressure...
If the wall thickness of your project is thin and flexible, the expanding foam will distort it. Use some way to keep the shape backed up until all expansion has stopped, (about 10 minutes is safe).
Work with small batches. Stir vigorously to get a complete mix. If mixing more than 1 pint, use a mixing wheel with an electric drill at a medium speed. More small batch pours will be easier to control & keep your waste to a minimum.
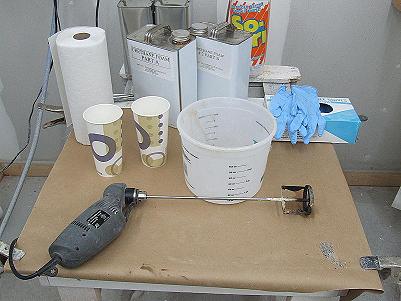
Tools & Supplies:
1 gallon mixing pot (for larger projects)
20 oz paper cups, both for mixing & measuring
Drill & mixing wheel
Paper towels
Disposable rubber gloves
Tape, paper, & other masking supplies
Carpenter's hand saw, razor blades, & other tools that may help you level the final surface
NOTE:
Urethane foam sets hard and is very resistive to all solvents.
If the foam gets onto any surface and hardens you will have to sand or scrape it off. It will also stain gelcoat.
Uncured & wet foam can be cleaned with acetone.
Keep things as clean as possible. Wipe the necks and lids of the foam containers. Use a clean paper towel for wiping each container. Thoroughly wipe out the mixing pot after each pour. Wipe mixing tools after each pour. Even trace amounts of the mixed foam will expand.
OK, here we go on the livewell:
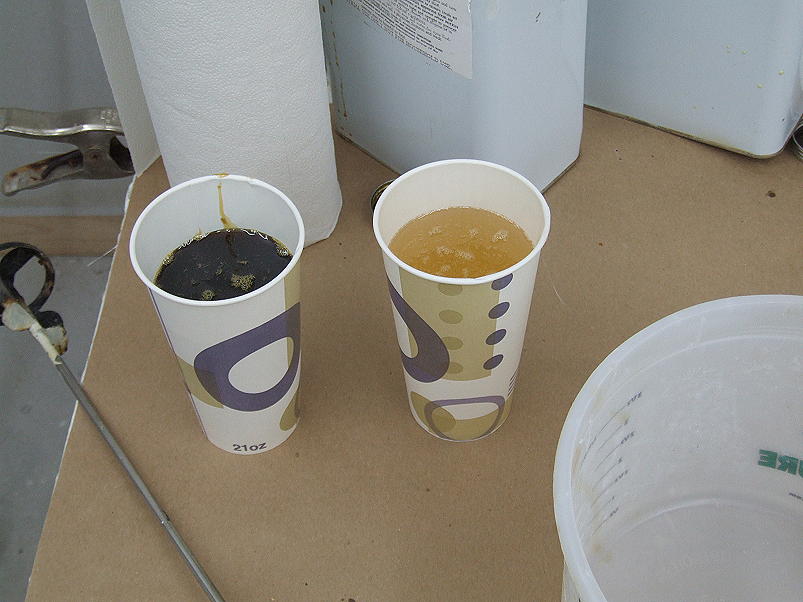
The two parts are measured into separate cups. These cups are 20 oz each, so I have about 16 oz in each for a total of about 32 oz & will use the drill to mix in the 1 gallon pot.

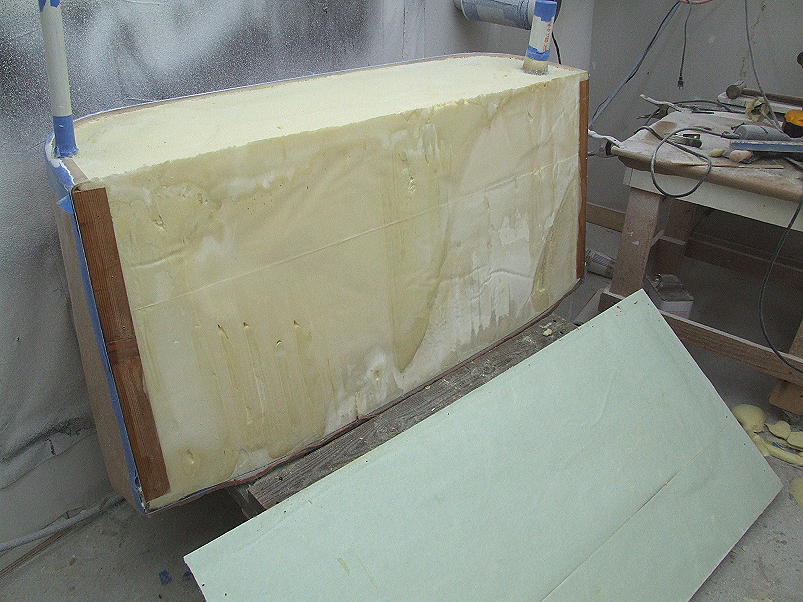
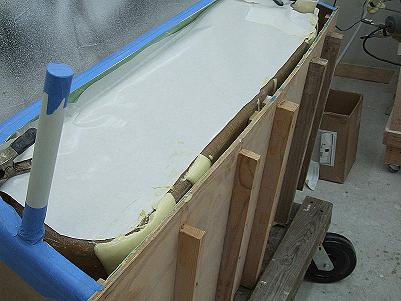
The livewell is filled with foam from the bottom. The back has a temporary wall screwed in place and all exposed gelcoated surfaces have been masked out.
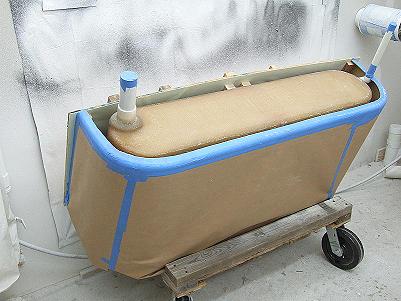
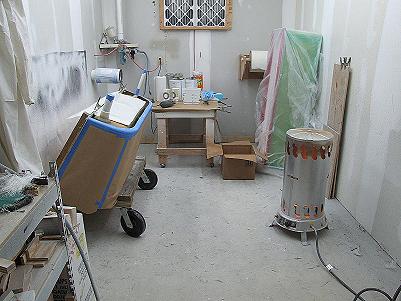
The temperature was only 40° F at the time I started the process so I worked in my spray booth with the propane heater keeping the temp at around 85°
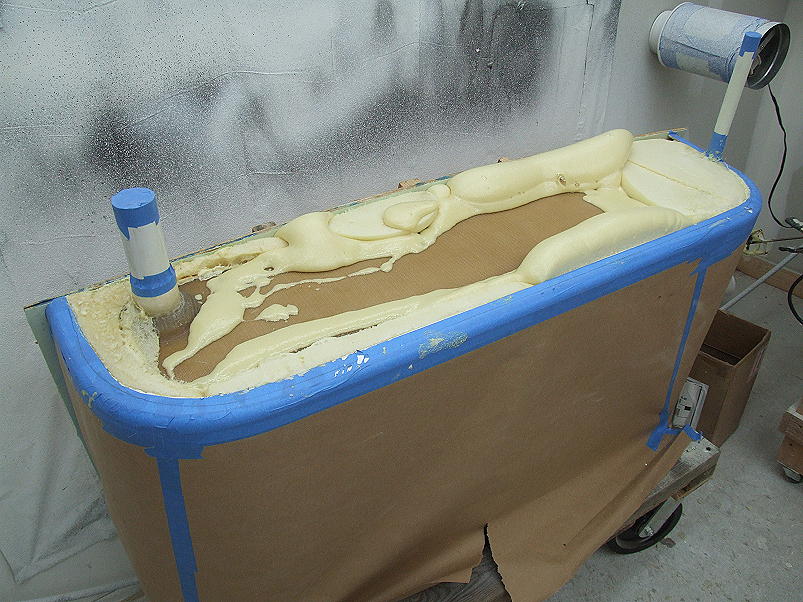
I have the livewell tilted over so that I can work one side & will tilt it the other way once the first side is getting close to full. The waxed paper across the base of the tub will keep the foam from prematurely building up on that surface.
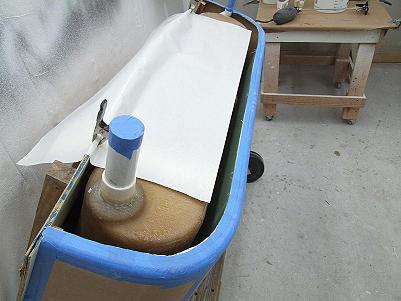
The first pour...
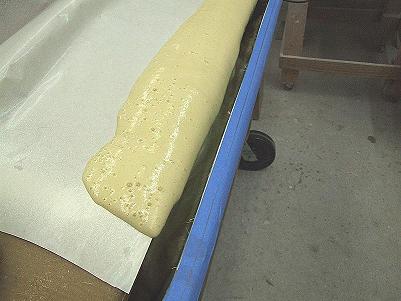
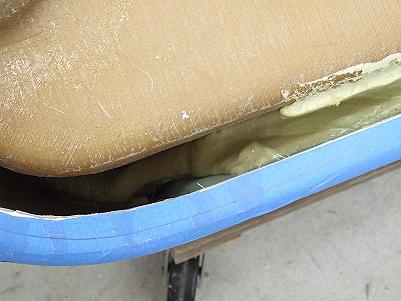
Beginning the other side...
I trim excess as I go... The plywood back wall is covered with a waxed paper surface that the cured foam will not stick to.

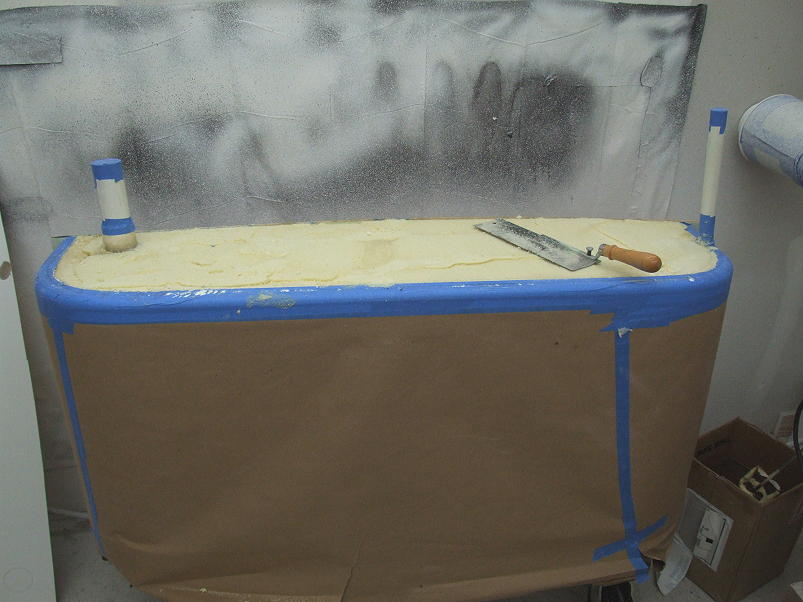
Now that the walls are full, the bottom will be covered.

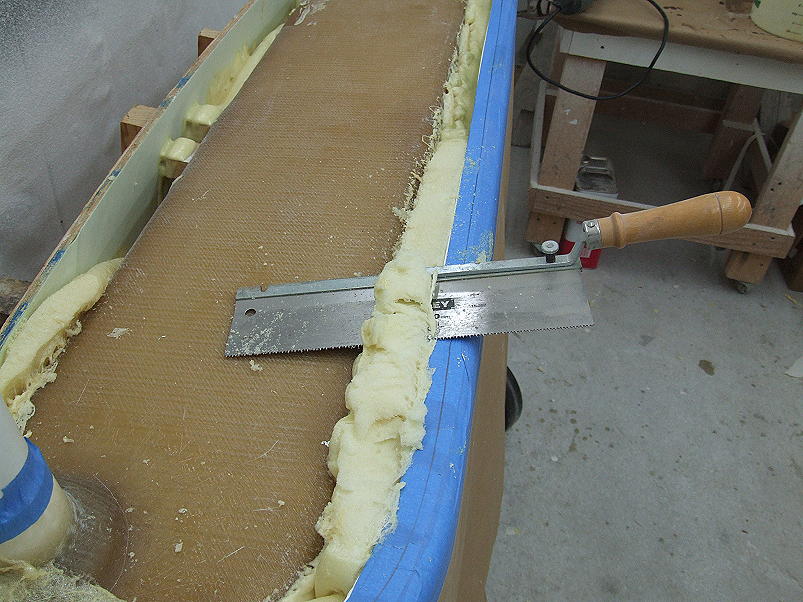
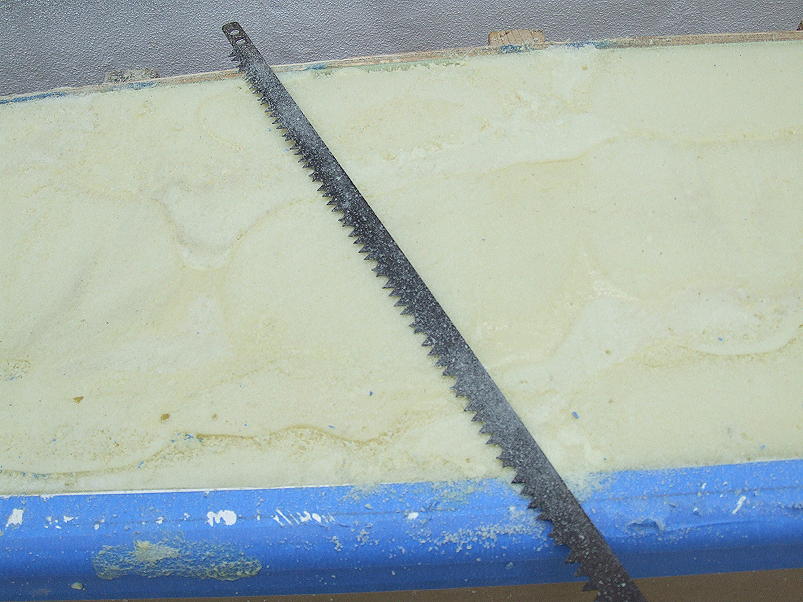
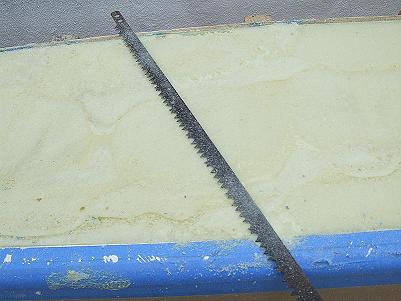
With the bottom filled, it is rough surfaced with a flush cut saw.

More detailed smoothing is done with a limb saw blade.
The final surfacing is done with a razor blade, held vertical & used as a scraper. The surface has to be below the fiberglass lavel so that the bottom palste of fiberglass can be inset.

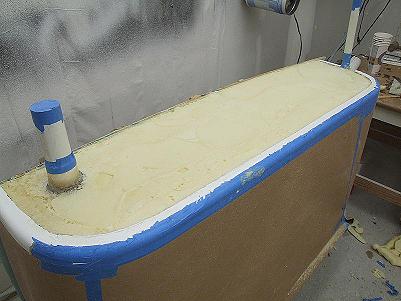
The back wall removed...

US Composites, in West Palm Beach, FL, is who I use for several of my fiberglassing materials & who supplies my urethane foam. I highly recommend them.
Below is the Foam FAQ from their site, along with the links that will take you there. The urethane foam page for US Composites is HERE.
|

|
Polyurethane
Foam FAQ
|
|
Ph.
561-588-1001
|

|
|
|
Polyurethane
Foam FAQ
|
|
|
|
|
|
|
|
1. What is
urethane foam?
|
|
Our urethane foam
is a two part, pour in place liquid that when
combined will expand into a rigid, closed cell
polyurethane foam.
|
|
|
|
2. What are the
differences between the foam densities?
|
|
The densities of
the foam refer to the weight of the foam when cured
per cubic foot (12" x 12" x 12"). Higher densities
will result in a heavier foam which is also
stronger. We have listed brief examples of hardness
and physical properties to help you select the
correct
density here.
Please also be aware that as you increase in
density your expansion ratio will decrease,
resulting in a higher cost per cubic foot of cured
foam.
|
|
|
|
3. Which density
is used for flotation in the bottom of a boat?
|
|
Our 2LB foam is
generally used for most marine flotation
requirements due to its good flotation properties
of approx. 60 lbs of buoyancy per cubic foot. For
flotation applications requiring some structural
elements such as helping to support your deck or
strengthening between stringers or bulkheads we
would recommend using our 4LB density foam,
which is also appropriate for filling around gas
tanks.
|
|
|
|
4. Is there a
hazardous fee for shipping?
|
|
No. These liquids
are not considered hazardous and can ship via
UPS Ground or Air shipping methods.
|
|
|
|
5. What will
I need to use the foam?
|
|
You will need
containers to measure and mix the foam and stir
sticks to mix the two parts together. Gloves and
eye protection are strongly recommended. This
product will out gas carbon dioxide when expanding
so for safety you should always work outdoors or in
a well ventilated area. You can use a solvent such
as acetone, denatured alcohol or lacquer thinner to
clean up when the product is still liquid, however
urethane foams will stick to virtually everything
except slick plastics so you should cover-up
anything you do not want the foam to
damage.
|
|
|
|
6. How much time
do I have to pour the foam?
|
|
After you have
combined the two components you have approximately
45 seconds before the foaming process begins. We
recommend that you stir the liquids vigorously for
25 seconds, after which time you have another 20
seconds to pour the foam into place. The foam will
fully expand in 5 minutes and be fairly hard in
about 15 minutes.
|
|
|
|
7. Can
I use multiple pours for large jobs?
|
|
Yes, this foam can
be poured in layers. For best adhesion you should
wait at least 15 to 20 minutes before pouring over
a previous batch.
|
|
|
|
8. How much do
I need to order?
|
|
You will need to
calculate the volume of your cavity by multiplying
the length x width x height
Example: 2 Ft x 2 Ft x 4 Ft = 16
CUBIC FEET
If calculating in inches convert all measurements
to inches
Example 24 inches x 24 inches x 48 inches = 27,648
CUBIC INCHES. Now to convert to cubic feet you
much divide that number by 1,728 which equals 16
CUBIC FEET.
See FAQ question
10 to
determine volume on a cylindrical type shape such a
pontoon.
|
|
|
|
9. Can
I use the foam outdoors?
|
|
Yes. Our expansion
rate of the foam is based on temperatures of 80
degrees F at moderate humidity. When using this
foam in temperatures below 80 F you will see a
reduction in expansion. At 50 degrees F you would
probably only get half the normal expansion. For
using the product during winter months it is ideal
to work in a heated garage/shop in which you can
get the product temperature and air temperature up
to about 80 F.
|
|
|
|
10. How much
foam will I need to fill my pontoon?
|
|
First of all, yes
you can fill your pontoon with this foam, however
it needs to be completely dry and any known holes
should be repaired before pouring this foam in.
(see
question 14 regarding water
resistance)
In order to calculate the volume of a cylinder
shape you must have the diameter of the
pontoon(measurement from side to side) and the
total length of the pontoon.
Example: Your pontoon size is 18 inch diameter x 14
feet long
First convert everything to inches. 18 in diam. x
168 inches long.
Since most pontoons are round we need the determine
the area of this round part.
Area is radius squared times pi (3.14).
We know that an 18" diameter is a 9" radius.
9" x 9" x 3.14 = 254 square inches
Now we multiple the area by the length.
254 sq. inches x 168 inches long = 42,672
CUBIC INCHES
Lastly we convert that to cubic feet.
42,672 divided by 1,728 = 24.69 cubic feet of total
space to fill.
This might not be an exact science since not all
pontoons are completely round and usually they
taper to each side, but this will give you a good
starting point.
|
|
|
|
11. Do you sell
equipment to spray your foams?
|
|
No. Our foams are
strictly designed for pour-in-place
applications.
|
|
|
|
12. I want
to release this foam from a mold what should
I do?
|
|
Well if your mold
is made from something already smooth such as a
plastic, metal or fiberglass than you can normally
use our mold release called Partall # 2 paste
wax found
here. This
product is applied like a car wax. Multiple coats
should be applied to new molds. The more coats you
apply and the better you buff the wax between each
coat the easier the foam will release.
For porous molds such as wood or plaster these
should first be sealed with either a lacquer,
polyurethane or shellac in order to create a smooth
surface in which to work. Then you can apply the
Partall paste wax as described above.
For people that don't want to go through the steps
above you can line your mold with a slick soft
plastic such as plastic drop cloths or plastic
sheeting and this should peel off the foam once
cured but it probably will leave some
wrinkles
|
|
|
|
13. Can
I use this foam for making decoys?
|
|
Sure, the most
common foams for making decoys are our 4LB and 8LB
densities. The actual density you decide on should
be based upon your desire for strength(8LB) versus
cost savings(4LB).
|
|
|
|
14. Is this foam
water resistant?
|
|
Yes, but with the
following caveat. The foams that we sell are
considered closed-cell, which means that each cell
that makes up the foam structure is completely
closed off from surrounding cells which prevents it
from acting like a sponge. It is completely safe
for this foam to be in contact with water for
hours/days/weeks and even months with no adverse
effects. However, it should never be submerged in
contact with water permanently. Over a period of
years the water contact can begin to soften the
foam and cause it to lose its closed-cell status.
This foam is designed primarily to be used as an
insurance policy in case of damage/holes that could
cause a vessel to lose buoyancy. Pinhole sized
openings would essentially have no effect on the
foam since the amount of exposure is so minimal but
you should always make repairs as soon as possible
to keep the foam effectiveness as good as possible.
This will be the case will all after market
closed-cell polyurethane foams and even
manufacturer installed foams.
|
|
|
|
15. Can
I dissolve this foam once it has fully cured?
|
|
No. This foam is
designed to be completely solvent resistant once
cured. Gasoline and acetone will not cause any
destruction of this foam. Please prepare ahead of
time by covering any objects/areas that you do not
want to come in contact with this highly adhesive
product. If you do happen to spill some foam and it
cures you will have to either sand or scrape the
product away.
|
|
|
|
16. How can
I make sure to get good expansion when working
with the foam?
|
|
The two things that
are most important to achieving good foam expansion
are as follows.
1. Temperature. If working below 80 degrees F you
will notice a slight reduction in expansion. If
trying to work in 40 to 50 degree weather you will
be lucky to get half the ideal expansion. Try to
work in a heated area, the liquids are not
considered flammable so you can use a heater
nearby. Also be sure to warm up the product before
use to at least 80 degrees, either by storing in a
heated room or by submerging the containers in a
bucket or warm water. If you're already working in
warm conditions these temperature precautions are
probably unnecessary.
2. Mixing Quality. The two liquid components should
always be stirred together for at least 25 seconds
as vigorously as possible before pouring. If
working with more than 1 gallon at a time a high
speed drill mixer would be a good idea. If you try
to mix 2 gallons of liquid together with just a
stir stick you will not get a good enough mix
resulting in a flawed chemical reaction with
reduced expansion. Try working in smaller liquid
quantities and pouring the product in layers
approximately 15 to 20 minutes
in-between.
|
|
|
|
|
|
|
©
2005 U.S. Composites, Inc.
info@uscomposites.com
|
Have fun! Feel free to download and print this article, but please don't use it on a website
without linking it to Bertram31.com.
Capt Patrick McCrary
Bertram31.com
site creation and maintenance by:Capt Patrick McCrary
©
834 Scott Dr., LLANO, TX 78643
Telephone 325.248.0809
Web site questions or comments to:
bertram31@bertram31.com
|