Bertram31.com
Bertram 31 Strut Backing
CAUTION! -- Perhaps the weakest structural element on the Classic Bertrams is the strut backing pad.
Bertram's way of designing and installing the 3/4" plywood strut pad on the B31, and all other classic models, was just plain wrong...
First, the pad is too small to spread the loading weight of the boat if run aground. Second, the pad was not properly bonded to the hull. Third, the layer of polyester fiberglass covering the pad was applied far too late after the hull layup was done, thereby having very little bond strength to the hull.
In essence, the strut pad yields almost no structural value to this critical assembly. It's cosmetic at best...
The following images, comments, and descriptions were compiled as a result of repairing Richard Eastman's 1974 FBC, "CLASSIC".
The evening before Richard was planning on using the boat, another boat had cut off a steel I beam day marker on the ICW. For whatever reason, the Coast Guard had not gotten around to marking the submerged stub, when about 12 hours later Richard ran over it at full cruise speed.
Fortunately, the stub was just deep enough below the surface that it didn't rip a gash through the hull. Running a few inches to starboard and/or a few inches lower on the tide, this encounter could have caused a true disaster!
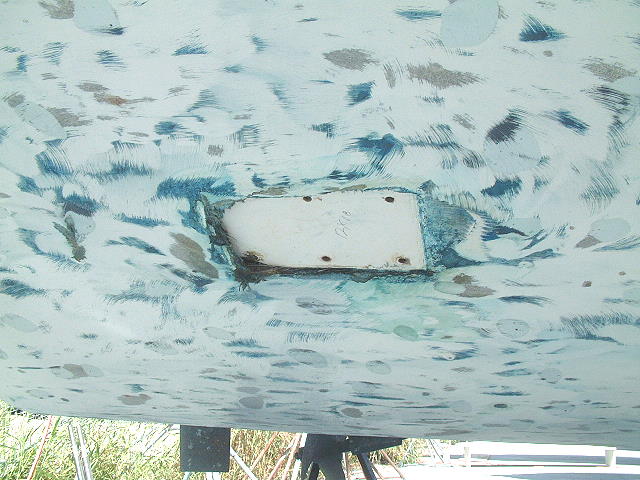
As luck would have it, only a deep gouge scared the hull, but as the base of the strut passed over the steel stub of the missing day marker, the strut was driven partially through the hull.
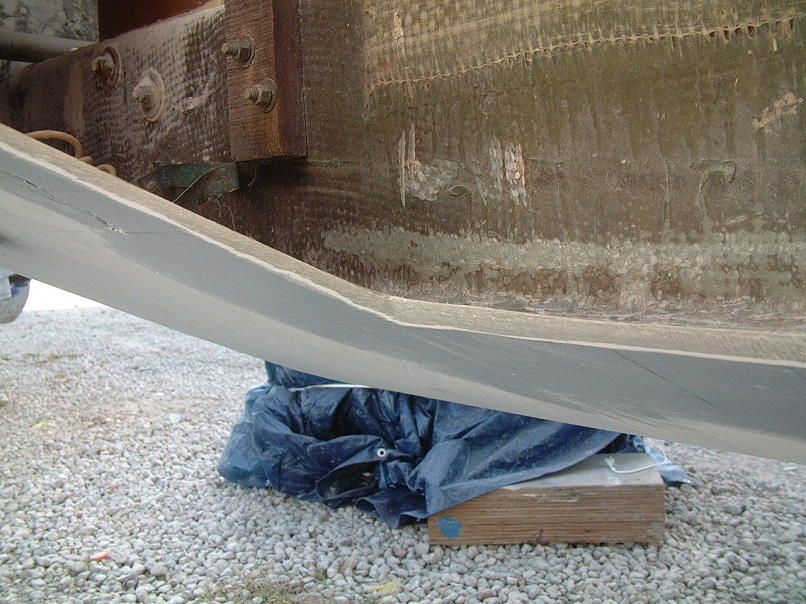
The image below, (click for a larger view), was taken after the boat was hauled & the strut removed. The aft half of the strut pad literally cut through the hull like a cookie cutter.

Had this been a hard grounding, it is most likely that the entire strut would have been driven through the hull. The possibility of such an event happening to any/or all stock B31s, 20s, 25s, 28s, or 33s is more on the "When it happens" scale than on the "If it happens" scale...
Rest assured, that if you do have the misfortune to have this happen, AND you still have the factory strut pads, you WILL most probably have one big hole in the bottom of your boat. Maybe Two!
The following progression will lead you through the entire repair and proper design and installation of the new strut pads on both sides of the boat.
Step One: Cutting out and prepping the damaged hull section.
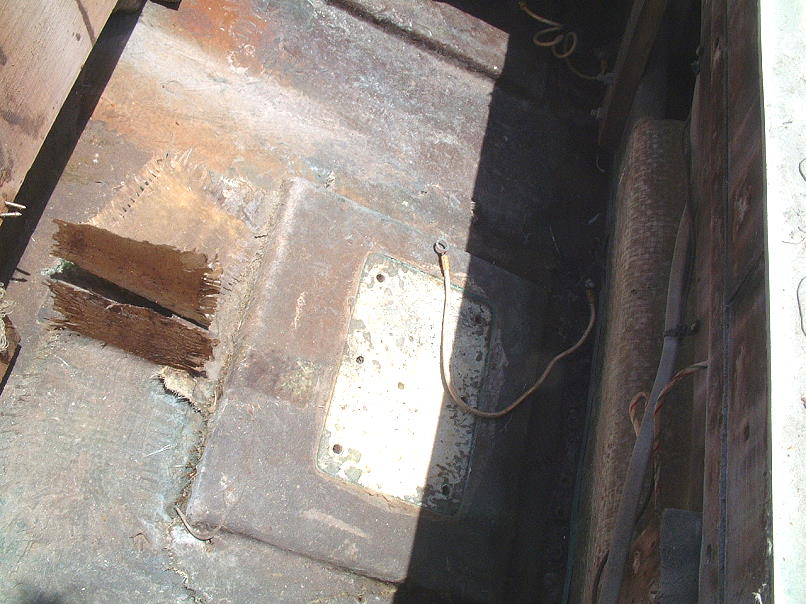
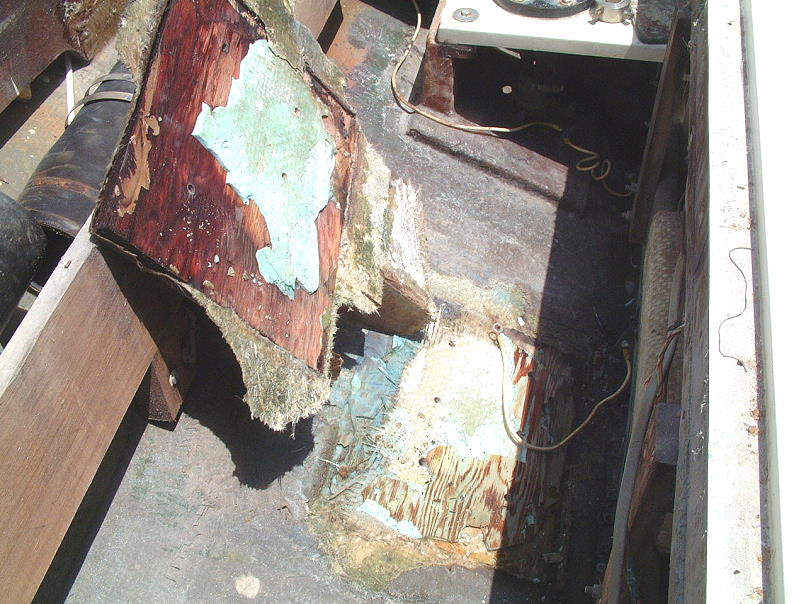
 You can clearly see above that the strut pad was de-tabbed and lifted from the hull at the time of impact. You can clearly see above that the strut pad was de-tabbed and lifted from the hull at the time of impact.
 With very little effort and no tools, the pad and fiberglass was peeled up using only one hand. Notice the black mold stain on the plywood indicating that moisture had long prior been present. The light blue material was simply a blob of plastic putty, (like Bondo), and hadn't even been spread for full coverage. With very little effort and no tools, the pad and fiberglass was peeled up using only one hand. Notice the black mold stain on the plywood indicating that moisture had long prior been present. The light blue material was simply a blob of plastic putty, (like Bondo), and hadn't even been spread for full coverage.
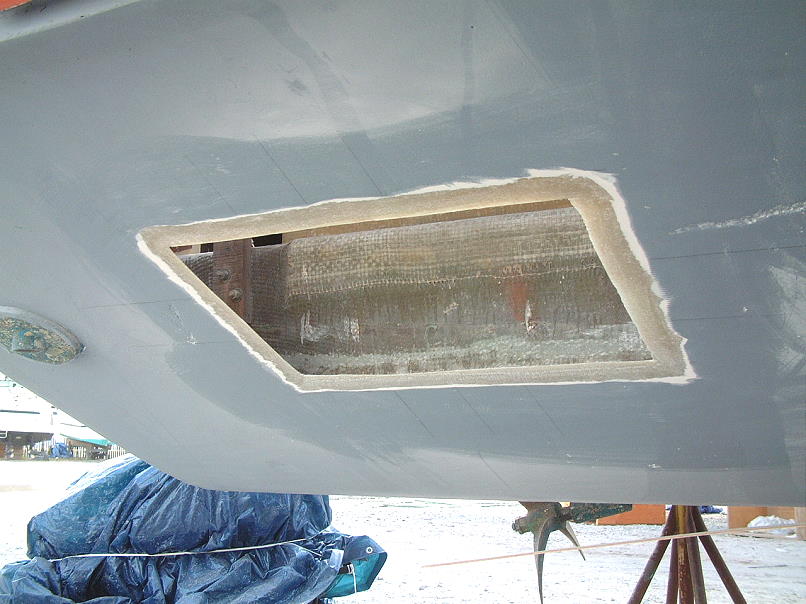
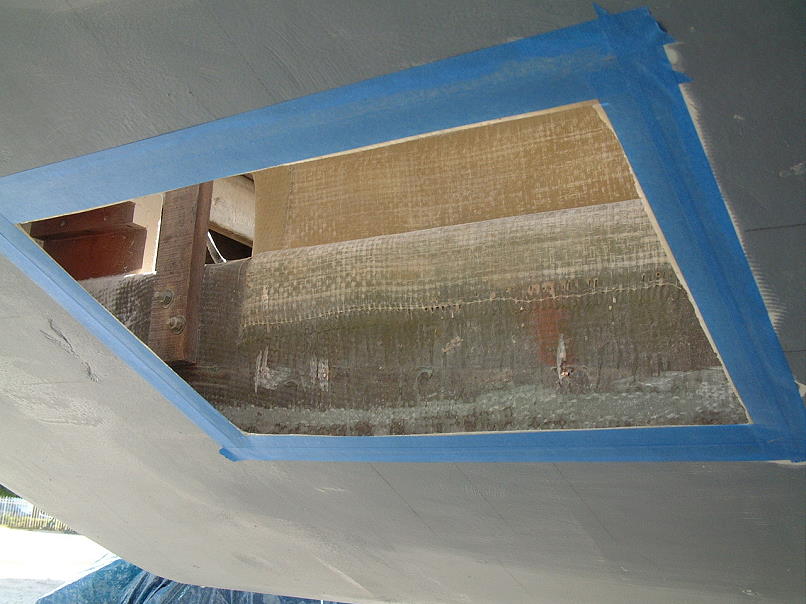
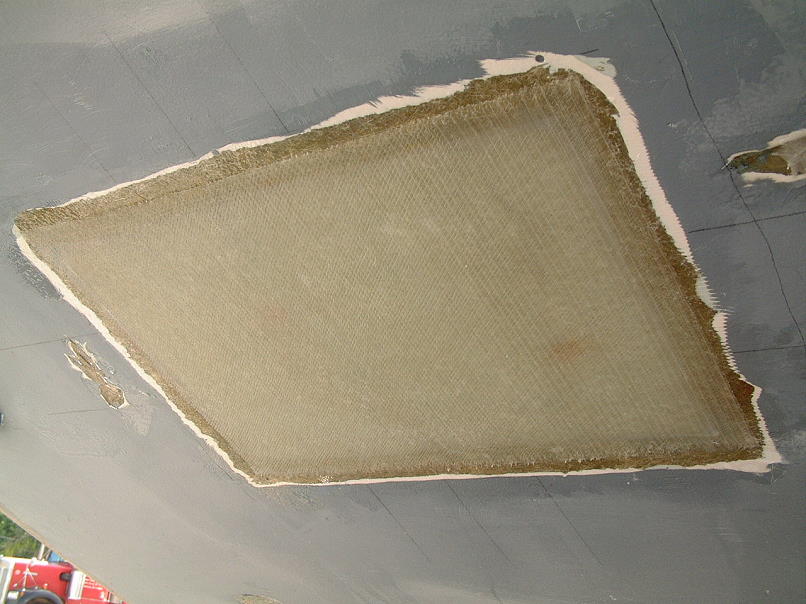
 Here the damaged section has been cut out using a 4" diamond wheel on a high speed grinder. A considerably larger hole is cut in order to get away from broken fibers radiating from the actual damage hole. Here the damaged section has been cut out using a 4" diamond wheel on a high speed grinder. A considerably larger hole is cut in order to get away from broken fibers radiating from the actual damage hole.
 The hole is scarfed by using a high speed grinder with a 36 grit disk. The scarfing is much deeper on the interior of the hull and is carried down to a knife edge. The hole is scarfed by using a high speed grinder with a 36 grit disk. The scarfing is much deeper on the interior of the hull and is carried down to a knife edge.


 There will be only one layer of 12 oz. biaxle fiberglass added to the exterior of the hull, (more on this reasoning later), with the bulk of the layup being applied to the interior. There will be only one layer of 12 oz. biaxle fiberglass added to the exterior of the hull, (more on this reasoning later), with the bulk of the layup being applied to the interior.
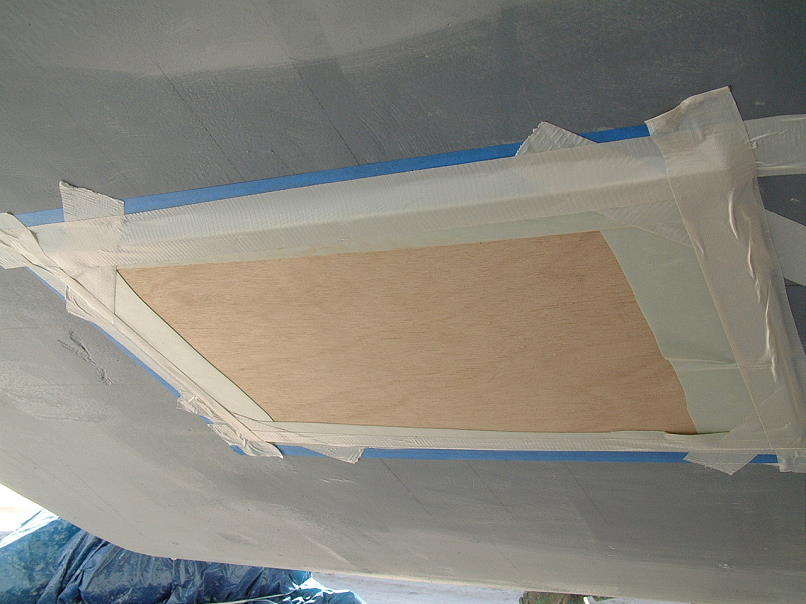
 To minimize future grinding and protect the exterior scarf, the perimeter is masked off. To minimize future grinding and protect the exterior scarf, the perimeter is masked off.
 A piece of 1/4" plywood covered with waxed paper is duct taped to fully cover the hole. A piece of 1/4" plywood covered with waxed paper is duct taped to fully cover the hole.
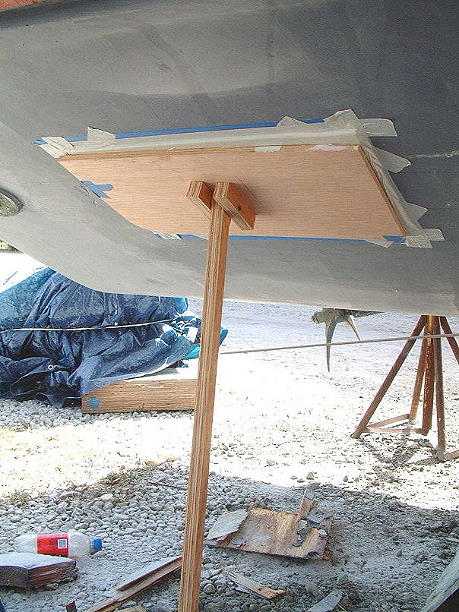
 Next, a piece of 1/2" plywood is supported firmly against the hull, thus completing a generally fair substrate to do the interior layup. ALL glass work will be performed with EPOXY... Next, a piece of 1/2" plywood is supported firmly against the hull, thus completing a generally fair substrate to do the interior layup. ALL glass work will be performed with EPOXY...

 The initial layup schedule will be alternating layers of 12 oz. 45/45 biaxle fabric and 32 oz. 0/90 fabmat. A total of 4 layers will be applied in the first layup. The initial layup schedule will be alternating layers of 12 oz. 45/45 biaxle fabric and 32 oz. 0/90 fabmat. A total of 4 layers will be applied in the first layup.

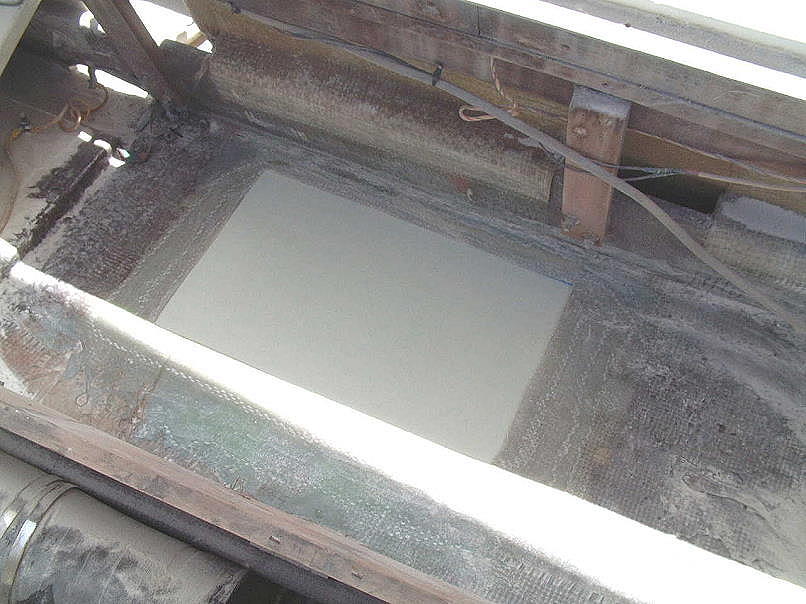
 After the initial layup has cured, the surface is ground fair and a final layer of 12 oz. biaxle is applied. The interior is now ready to install the strut pad. Since my pad will extend all the way to the inboard stringer, a section of 1/2" PVC pipe has been laid so that water can drain aft. After the initial layup has cured, the surface is ground fair and a final layer of 12 oz. biaxle is applied. The interior is now ready to install the strut pad. Since my pad will extend all the way to the inboard stringer, a section of 1/2" PVC pipe has been laid so that water can drain aft.

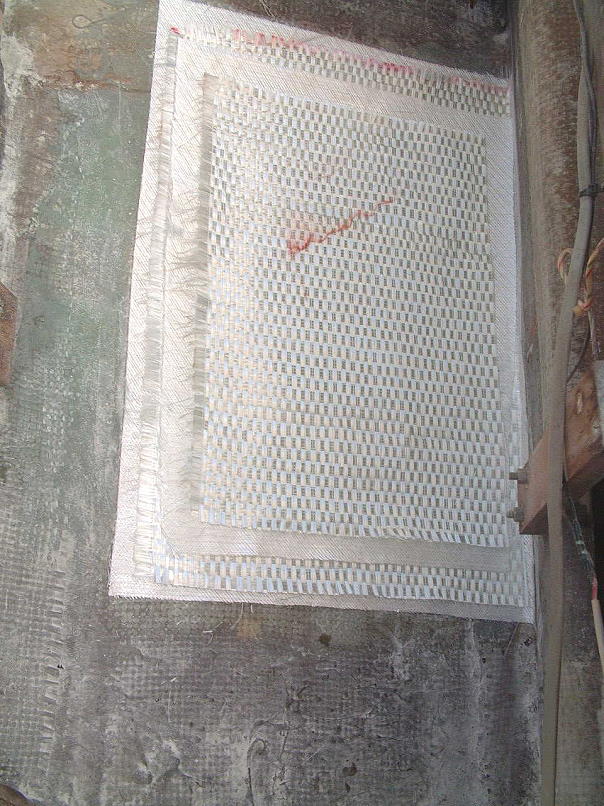
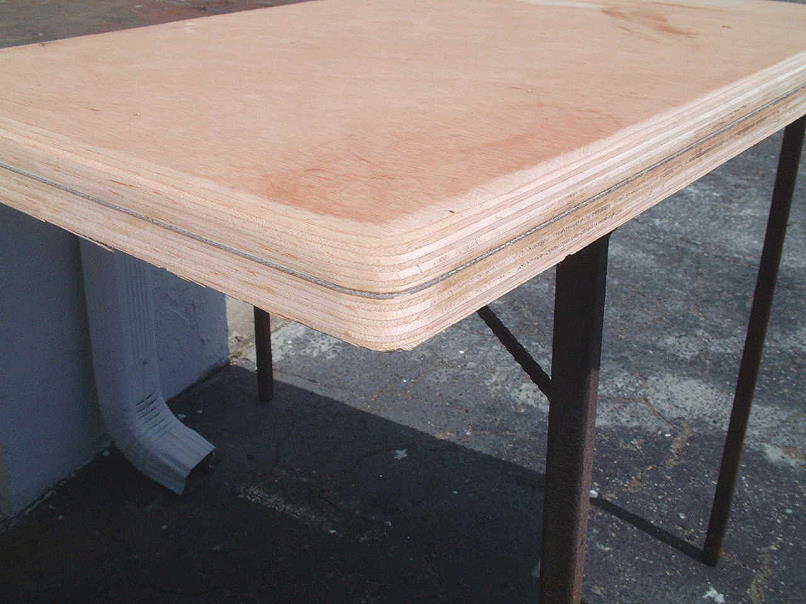
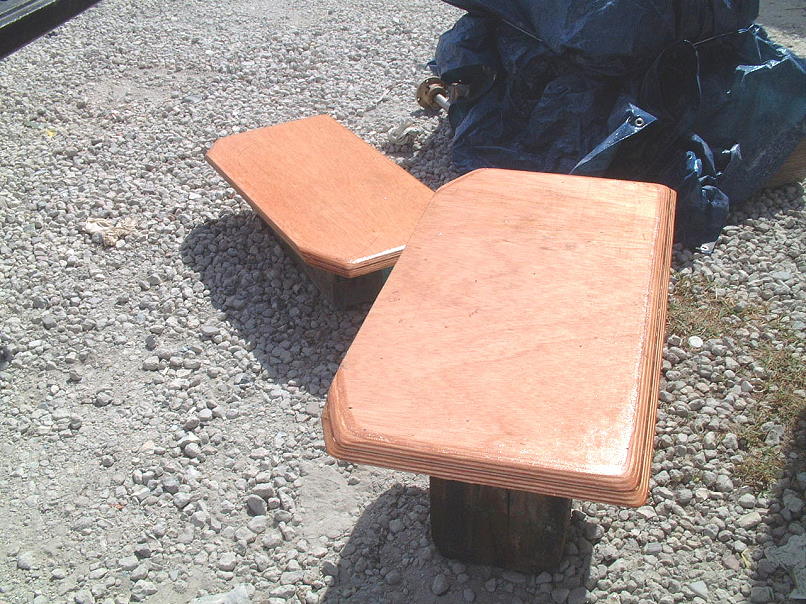
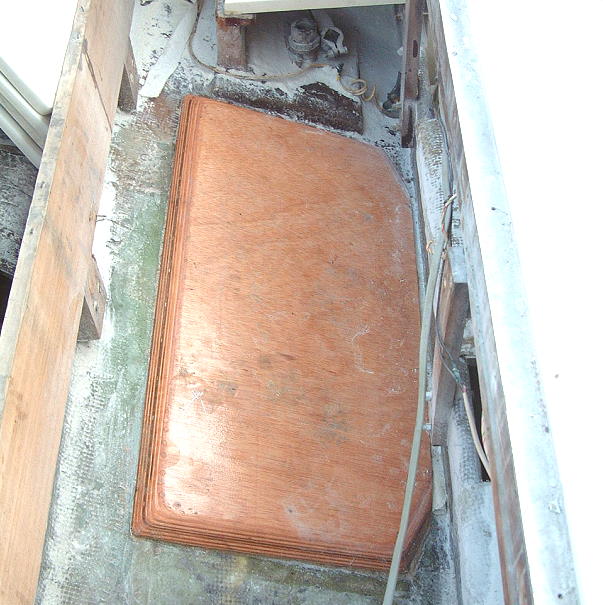
 The new strut pads are made from two panels of 1/2" marine plywood separated by a layer of 12 oz. biaxle. Total thickness is just over 1" Later the underside of the pads will be glassed with yet another layer of 12 oz. biaxle. The new strut pads are made from two panels of 1/2" marine plywood separated by a layer of 12 oz. biaxle. Total thickness is just over 1" Later the underside of the pads will be glassed with yet another layer of 12 oz. biaxle.

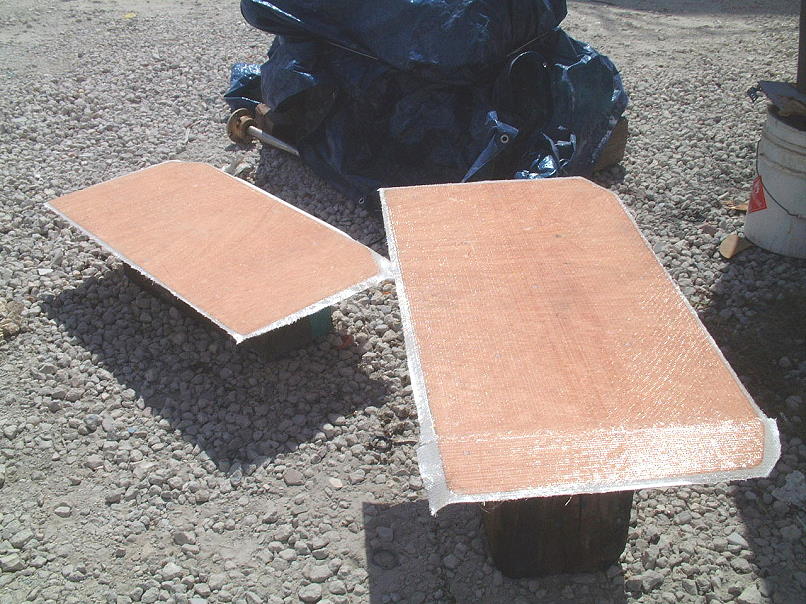
 Both pads are first epoxy coated on the top surfaces, then a layer of biax is added to the under sides. Both pads are first epoxy coated on the top surfaces, then a layer of biax is added to the under sides.
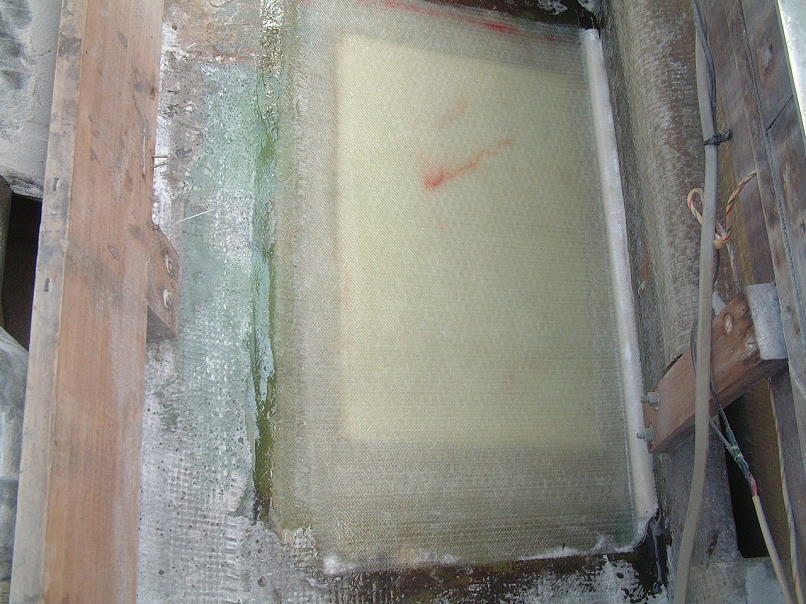
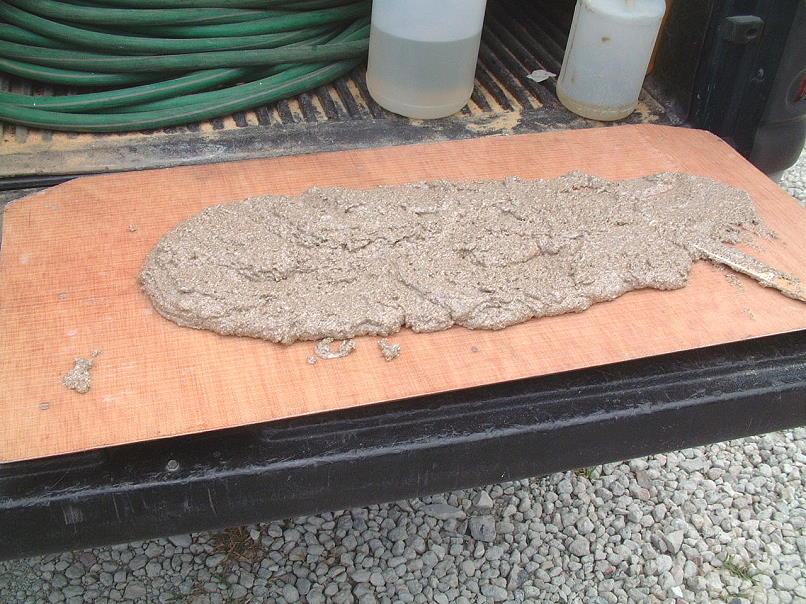
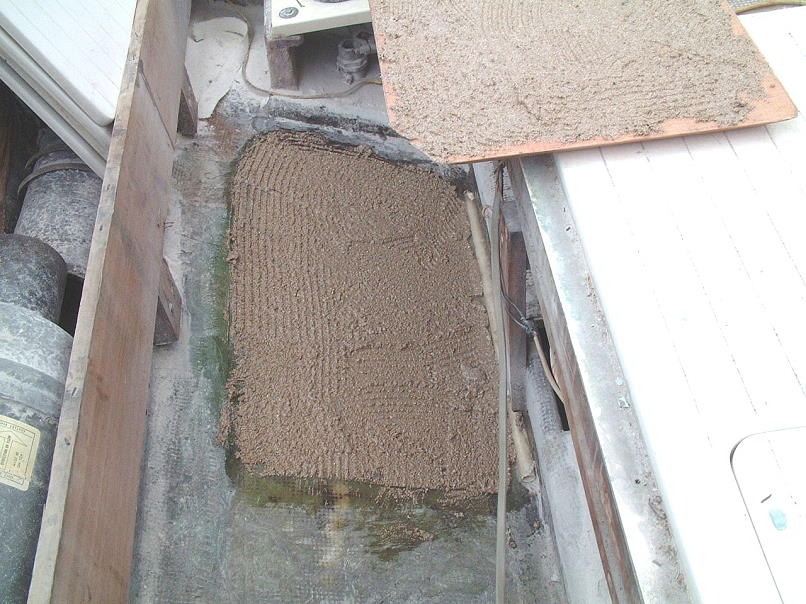
 Next a large volume of epoxy is mixed and both the hull and underside of the pad is primed with the un-thickened epoxy. The remainder of the epoxy is then thickened with Cab-O_Sil, (fumated silica), and vermiculite to make the bedding mud. The consistency of this mix is between mayonnaise and peanut butter. Next a large volume of epoxy is mixed and both the hull and underside of the pad is primed with the un-thickened epoxy. The remainder of the epoxy is then thickened with Cab-O_Sil, (fumated silica), and vermiculite to make the bedding mud. The consistency of this mix is between mayonnaise and peanut butter.

 The mud is troweled onto both bonding surfaces with a 1/4" square toothed trowel. The mud is troweled onto both bonding surfaces with a 1/4" square toothed trowel.
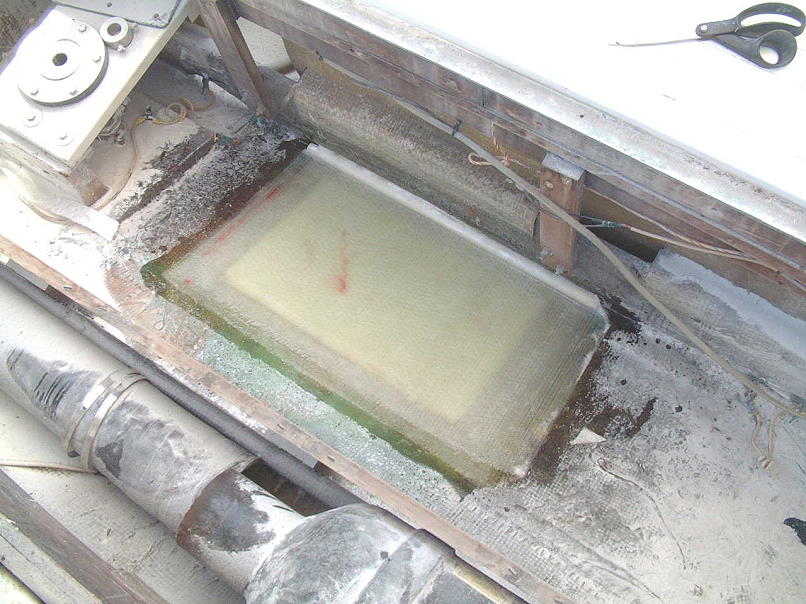
 The pad is now firmly pressed against the hull and all squeeze out is cleaned up. The grainy vermiculite keeps the pad from squeezing out too much epoxy... The pad is now firmly pressed against the hull and all squeeze out is cleaned up. The grainy vermiculite keeps the pad from squeezing out too much epoxy...
 The exterior of the repair has a single layer of 12 oz. biax applied. The edges will be feathered in, leaving this layer of fiberglass slightly below the surounding hull surface. After fairing with a high density epoxy compound, no fiberglass edge will be exposed. It is very critical than fiberglass edges are completely faired over so that hyro-peeling can not take place. The exterior of the repair has a single layer of 12 oz. biax applied. The edges will be feathered in, leaving this layer of fiberglass slightly below the surounding hull surface. After fairing with a high density epoxy compound, no fiberglass edge will be exposed. It is very critical than fiberglass edges are completely faired over so that hyro-peeling can not take place.
MORE TO COME LATER.......
Have fun! Feel free to download and print this article, but please don't use it on a website
without linking it to Bertram31.com.
Capt Patrick McCrary
Bertram31.com
site creation and maintenance by:Capt Patrick McCrary
©
3640 Investment Ln. #15, West Palm Beach FL 33404
Telephone 561.848.3366
Web site questions or comments to:
bertram31@bertram31.com
|