Fiberglass advice needed

The Main Sand Box for bertram31.com

Moderators: CaptPatrick, mike ohlstein, Bruce

Post Reply
User avatar
John F.
Senior Member
Posts: 2101
Joined: Jun 29th, '06, 07:58

Fiberglass advice needed

Post by John F. »

My B20 is in and getting used. I've pretty much decided to keep the foredeck, but to smooth it out--take out the hatch, fill lots of small bolt holes to large glove box and compass holes, and cut out where the instrument panel/helm was. I'm planning on having a single pop-up cleat on the foredeck--that's it.

The f'glass is about 1/4" thick. I've read the instructions about scarfing, etc., and have West epoxy and fillers on hand. I don't know what to use as far as cloth, mat, etc. Also, I have some real thin, maybe 1/4" marine ply. Should I use that to fill in the big stuff, like the hatch, and glass over/under it?

Any suggestions will be greatly appreciated.

These pics. should give an idea of what I need to do.

Image

Image

Image
1968 B20 Moppie - Hull # 201-937
1969 B31 FBC - Hull # 315-881 (sold)
1977 B31 FBC - Hull # BERG1652M77J
User avatar
Rawleigh
Senior Member
Posts: 3432
Joined: Jun 29th, '06, 08:30
Location: Irvington, VA

Post by Rawleigh »

I assume that the deck is plywood cored?
Rawleigh
1966 FBC 31
ianupton
Senior Member
Posts: 548
Joined: Jul 1st, '06, 16:53
Location: Peninsula, OH

Post by ianupton »

John - are you planning on painting after or are you going to match gelcoat?

For the screw holes, I attacked with the grinder, dish out really nice and deep. I went about 3/4 of the way through the original laminate thickness. Depending on thickness, keep the scarf pretty shallow so you will have about a 2 inch sized dish.

Wipe clean, cut your glass (i used 1708 for deeper ones or just plain matt if it was shallow) and lay it in. I overfilled every hole and ground / sanded smooth after cure. I was painting so I sanded smooth then Ryan at RCS went over with the Duratec fairing primers, etc.

For the dash cutouts, I would scarf the edges, put some plywood in as core and layup with 1708 same as the smaller holes.

I used Vinlyester throughout and thought it was easier to use than epoxy.

Ian.
User avatar
John F.
Senior Member
Posts: 2101
Joined: Jun 29th, '06, 07:58

Post by John F. »

Rawleigh- The foredeck looks llike 1/4" or so of glass with a 1/4" or so of plywood that's exposed from the underneath.

Ian- Thanks. She's painted now, so she'll be painted. I'm not redoing the boat at this point, I just want to get the foredeck straightened out. Next would be stringers/deck, followed by bottom job/exterior paint. Little bit at a time though.
1968 B20 Moppie - Hull # 201-937
1969 B31 FBC - Hull # 315-881 (sold)
1977 B31 FBC - Hull # BERG1652M77J
User avatar
CaptPatrick
Founder/Admin
Posts: 4161
Joined: Jun 7th, '06, 14:25
Location: 834 Scott Dr., LLANO, TX 78643 - 325.248.0809 bertram31@bertram31.com

Post by CaptPatrick »

John,

Sorry for the slow response, was out of pocket until yesterday evening...

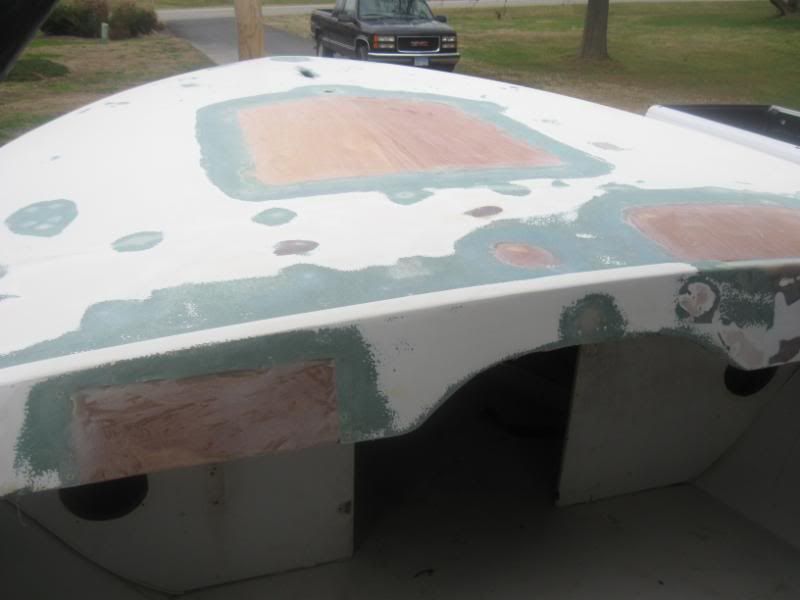
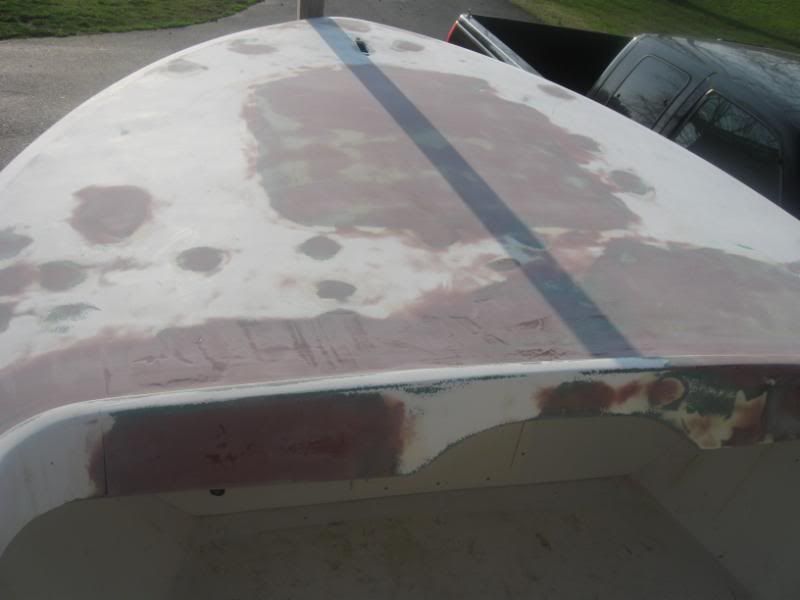
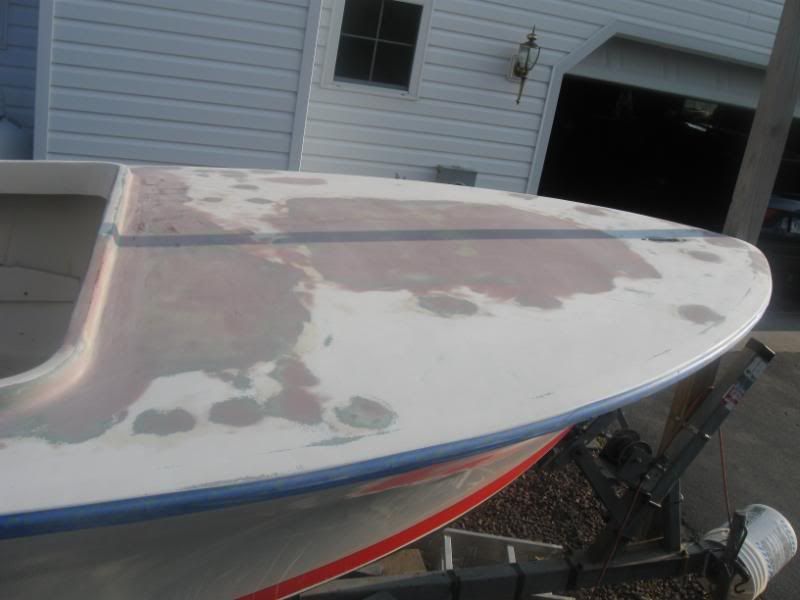
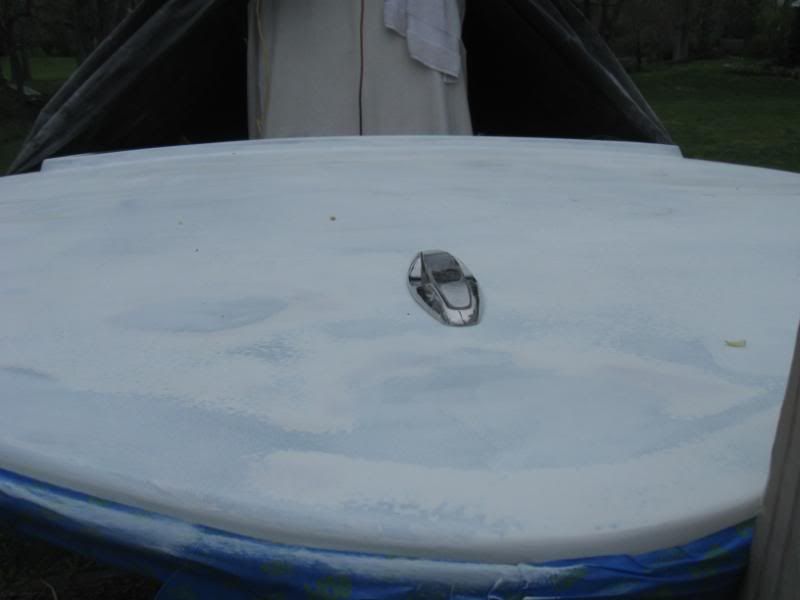
First, keep in mind that epoxy has a higher shrinkage rate than polyester or vinylester, plus it takes up to a year for the shrinkage to finally reach a point that it doesn't ghost, (print through), back under the paint.

This is really only an issue when doing high visibility work like you'll be doing...

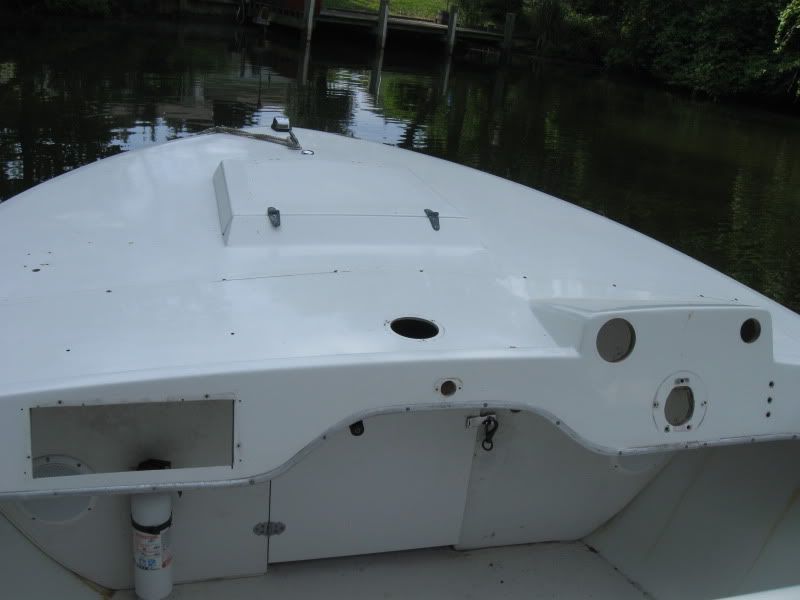
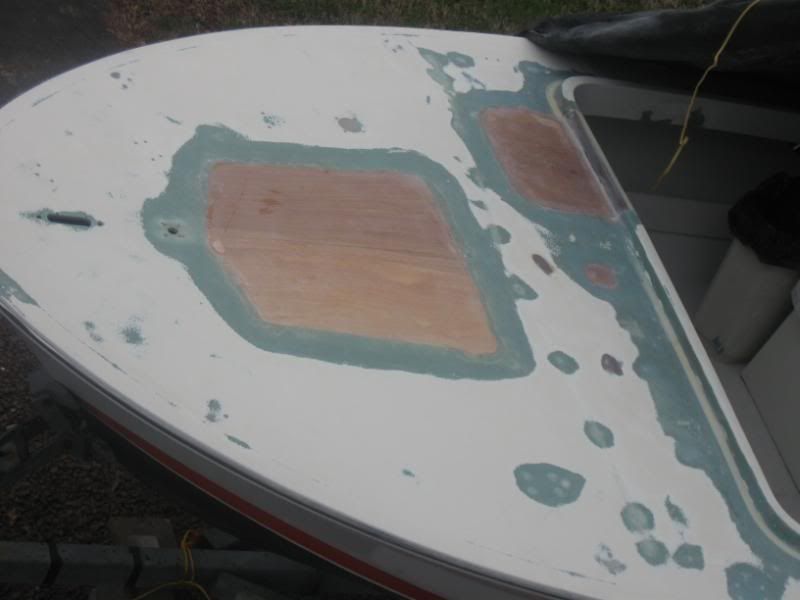
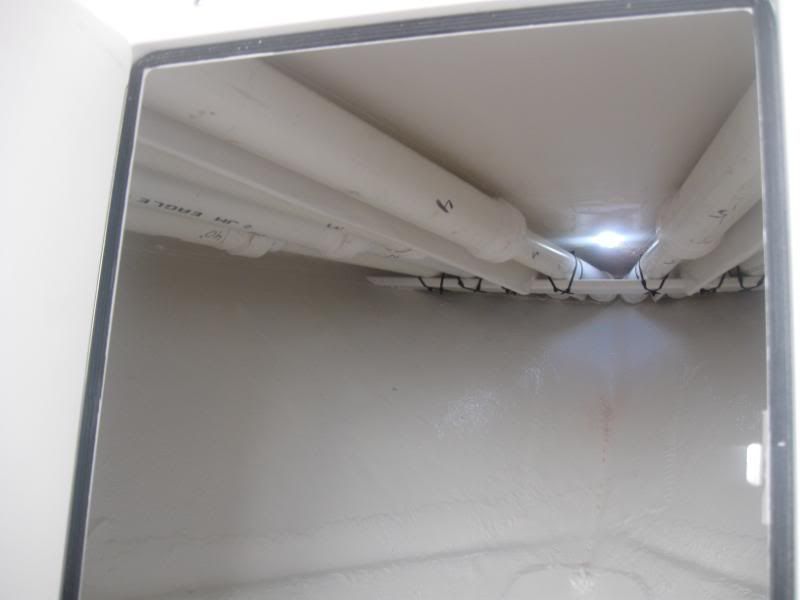
1708 or 1208 biaxle is a good choice for the larger areas but needs to be buried beneath a couple of layers of chopped strand mat to keep the weave from ghosting back.

Mat can be used with epoxy but it won't completely wet out because the binder that hold the strands together is formulated to dissolve in contact with styrene. (See: West System Epoxy Article on mat)

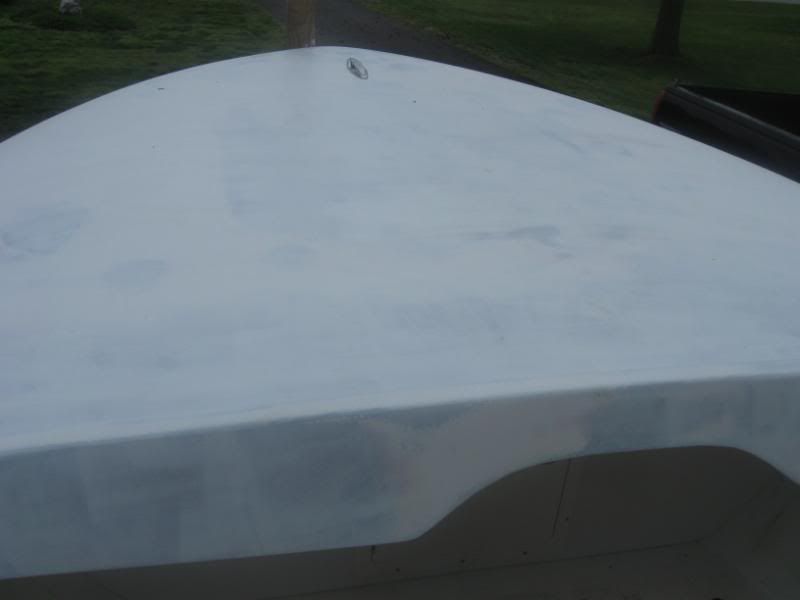
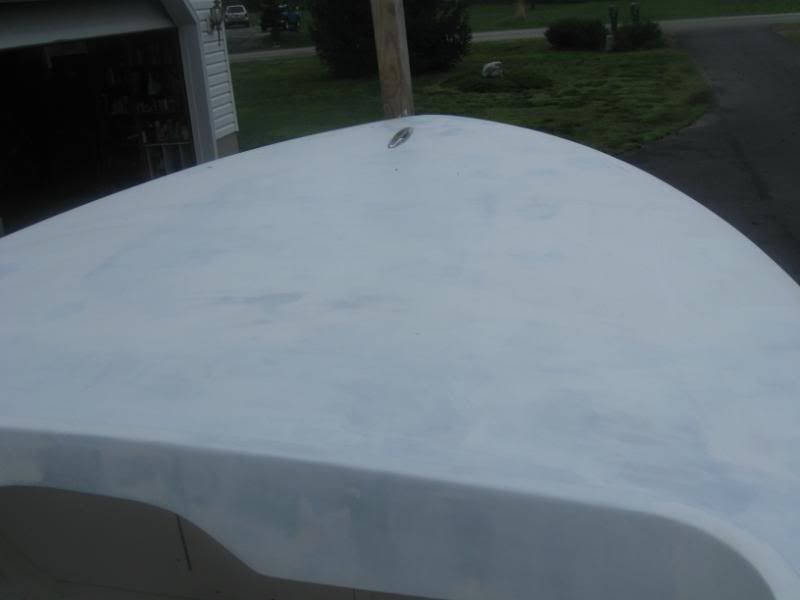
Make all of your epoxy modifications to stand above the finished surface by 1/8" and allow at least a couple of weeks for the epoxy to shrink down before grinding.

Your initial grinding should bring the modification down to about 1/32" below the finished surface to allow for fairing. The best fairing compound is Awlfair, (also an epoxy) has a very low shrinkage rate, sands easily and further prevents ghosting of the substrate.

Prep for the Awlfair is a sanding with 220 paper and a couple of layers of 545 Awlgrip epoxy primer, sanded with 320 paper. The longer that you can put off fairing the less ghosting you have to deal with. Final fairing shoud be done about a week before top coat painting.

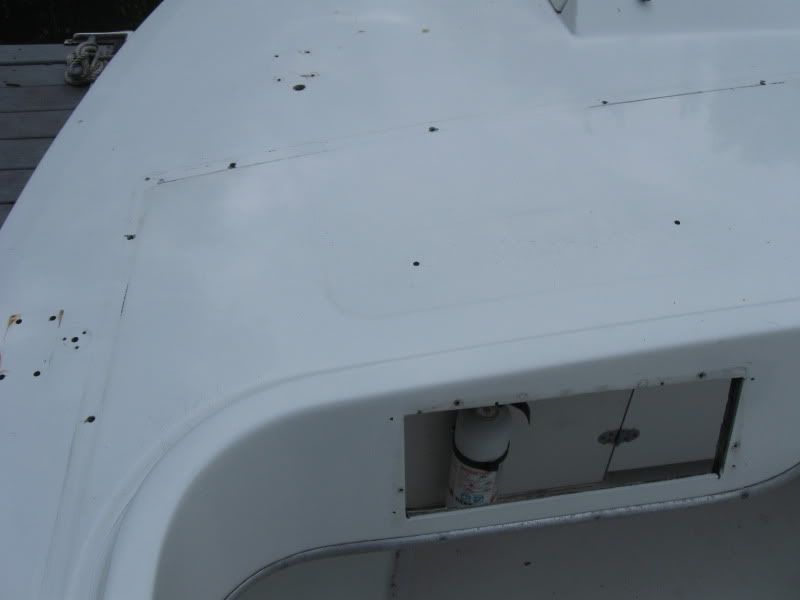
Backing large holes with 1/4" plywood is fine, but try to make the backing larger than the hole so that you won't have ghosting issues from that perspective.
User avatar
John F.
Senior Member
Posts: 2101
Joined: Jun 29th, '06, 07:58

Post by John F. »

She's not a B31 (sure do miss the Anna E.), but I've started the winter foredeck project on my B20. I've cut out the hatch, helm area, epoxied in marine ply backers and filled alot of holes. No f'glass yet, and I need to figure out where the bulkhead is going. I'll probably move it back to the edge of the foredeck. Gonna' play around with fishing rods and figure it out today hopefully.


Image

Image
1968 B20 Moppie - Hull # 201-937
1969 B31 FBC - Hull # 315-881 (sold)
1977 B31 FBC - Hull # BERG1652M77J
User avatar
In Memory Walter K
Senior Member
Posts: 2912
Joined: Jun 30th, '06, 21:25
Location: East Hampton LI, NY
Contact:

Post by In Memory Walter K »

John- Having a B-20 Bahia Mar, I have found having a lockable storage area for often used rods and lure boxes, etc. a distinct advantage. What I DID find a pain in the ass was getting to the bow cleat to tie and untie the boat. If you reach it from the cockpit, fine. If not, move it back till you can. Also, easy access to your anchor. Walter
User avatar
tunawish
Senior Member
Posts: 301
Joined: Mar 28th, '08, 21:58
Location: Swampscott, Ma
Contact:

Post by tunawish »

Walter K wrote:John- Having a B-20 Bahia Mar, I have found having a lockable storage area for often used rods and lure boxes, etc. a distinct advantage. What I DID find a pain in the ass was getting to the bow cleat to tie and untie the boat. If you reach it from the cockpit, fine. If not, move it back till you can. Also, easy access to your anchor. Walter
Agree with what Walter said.....

Looking good though John...

Ray
User avatar
Rocky
Senior Member
Posts: 690
Joined: Nov 23rd, '08, 10:36
Location: Northern California

Post by Rocky »

Looks good John,
Now you've got step by step instruction from the Capt
So get going on fairing! BTW have you ever thought of
Going with non skid up on the deck? That would cut down
on having to be so blemish free on finish work?
User avatar
CaptPatrick
Founder/Admin
Posts: 4161
Joined: Jun 7th, '06, 14:25
Location: 834 Scott Dr., LLANO, TX 78643 - 325.248.0809 bertram31@bertram31.com

Post by CaptPatrick »

BTW have you ever thought of
Going with non skid up on the deck? That would cut down
on having to be so blemish free on finish work?
Never think, even for a moment, that non-skid will hide poor craftsmanship...
User avatar
Rocky
Senior Member
Posts: 690
Joined: Nov 23rd, '08, 10:36
Location: Northern California

Post by Rocky »

O.K. Capt.,
I see how you don't want to skip any major fairing steps in the process
before a non skid would go on, but when you get to the point after it is
shaped properly and smooth, I meant the last steps after primer say,
using the Kiwigrip product. You would still see imperfections show through
with such a heavy thickness?

[url]
http://www.jamestowndistributors.com/us ... ne=adwords
User avatar
John F.
Senior Member
Posts: 2101
Joined: Jun 29th, '06, 07:58

Post by John F. »

It'll be a challenge, but I'm hoping that with alot of fairing, I can get the foredeck right. I gave my windshield to John D., but got it back yesterday to make sure that the radius in the foredeck is right. Thanks for the comments.
1968 B20 Moppie - Hull # 201-937
1969 B31 FBC - Hull # 315-881 (sold)
1977 B31 FBC - Hull # BERG1652M77J
User avatar
CaptPatrick
Founder/Admin
Posts: 4161
Joined: Jun 7th, '06, 14:25
Location: 834 Scott Dr., LLANO, TX 78643 - 325.248.0809 bertram31@bertram31.com

Post by CaptPatrick »

Rocky,

I've never used, or even seen, the Kiwi Grip, but I hear it's a lot like pickup bed liner material... I'd guess that kind of thickness and texture could hide up to 1/64" of irregularity.

Also, the quicker the transition between irregularities the more visible the irregularity becomes. Vertical surfaces will show irregularities more than horizontal surfaces. Vertical surfaces reflect nearby objects like pilings, water, the boat in the next slip. Horizontal surfaces only reflect the sky and any vertically attached item in the boat, such as an engine box, hand rail, or cleat.

One way to determine fairness is to flood the surface with water. While it's dripping wet, stand back and observe the surface. If you can see unwanted transition areas, fair it some more.

By doing this, you'll be assured that regardless what finish material is used, the surface will be cosmetically pleasing. Once a final finish has been applied, it too late to make corrections...

Br,

Patrick
User avatar
Rocky
Senior Member
Posts: 690
Joined: Nov 23rd, '08, 10:36
Location: Northern California

Post by Rocky »

Yeah Capt. Pat I've seen this on a boat (just walking by) and talked to
the owner a bit he applied it himself, claims there is no "aggregate" or foreign material in the stuff.
It gets it's non skid properties through a special
roller so there is nothing to fall out in time with heavy cleaning. Apparently
there are different textures for different techniques also. (light to heavy).
But I've got to say the glossy deck does look great, that kind of uncluttered
look! Good luck with her John it's looking great so far, I like the center console how it turned out, that was your design right?
User avatar
John F.
Senior Member
Posts: 2101
Joined: Jun 29th, '06, 07:58

Post by John F. »

Rocky-

I built the console to fit me and the boat. Its narrow enough that I have 20"+ on either side to walkaound it, and the control height and overall height are sized to fit me (5'6")--not too tall.
1968 B20 Moppie - Hull # 201-937
1969 B31 FBC - Hull # 315-881 (sold)
1977 B31 FBC - Hull # BERG1652M77J
cmccool
Posts: 37
Joined: Jun 29th, '06, 21:41
Location: Vancouver Island, Canada

Post by cmccool »

Kiwigrip is awesome stuff. Easy to put on and will absolutely cover a 1/64" inch problem in your fairing.

I did mine 3 years ago and it still looks great - other than being dirty at the moment.

2 thumbs up from me for that stuff.

Cliff
User avatar
Bob H.
Senior Member
Posts: 1279
Joined: Jul 10th, '06, 19:49
Location: Rehoboth, Mass.
Contact:

Post by Bob H. »

John, My tip would be to use peel n ply on any wetted out surface, rolls on top of wet poly or epoxy, helps to get air bubbles out making for a better finished surface..early next day peel off and presto top shelf surface for any prime, filler or paint...on Capt pats link to west system the mention it briefly...ask Harry Babb how it works...I wont glass without it..BH
1966 31 Bahia Mar #316-512....8 years later..Resolute is now a reality..Builder to Boater..285 hours on the clocks..enjoying every minute..how many days till spring?
User avatar
John F.
Senior Member
Posts: 2101
Joined: Jun 29th, '06, 07:58

Post by John F. »

How I've been spending my winter. The foredeck has been glassed and I've just started to fair. We'll see how that goes. Just did the first attempt and a rough sand. I did another coat today, and tomorrow I'll give hand-sand this time and maybe make a long fairing board to try to get where I glassed the hatch right.

Image

Image

I made a new one-piece bulkhaed, installed an access door, and built in some rod storage under the foredeck. There's storage for 8 rods. 6 have to be 6'6" or less, and the 2 out rod tubes are angled out and can handle at least a 7' rod. The rods slide into the PVC tubes, with the reels and butts extending out but under the foredeck so they're protected.

Image

Image

Image

I need to come up with some way to hold the butts up to the underside of the foredeck. I was thinking of making short little bungees for each rod butt with the ends attached to the underside of the foredeck. I don't have any extra room to make a regular rod holder work once I slide the rod in the tube. Any ideas?
1968 B20 Moppie - Hull # 201-937
1969 B31 FBC - Hull # 315-881 (sold)
1977 B31 FBC - Hull # BERG1652M77J
User avatar
JohnD
Senior Member
Posts: 409
Joined: Jun 29th, '06, 09:48
Location: Baltimore, MD

Post by JohnD »

John,

Melinda's got an idea of how it could work. However I'm unqualified to expain what she means..... I think I understand but don't want to over-reach my intelligence.

We'll give ya a call later on Sunday night ( I've got to cook and serve corned-beef and cabbage)

br,
JohnD
User avatar
In Memory Walter K
Senior Member
Posts: 2912
Joined: Jun 30th, '06, 21:25
Location: East Hampton LI, NY
Contact:

Post by In Memory Walter K »

Cut circles of foam or sponge material and push them into the holes after the rods have been inserted, holding the rods in the position desired.
User avatar
Bob H.
Senior Member
Posts: 1279
Joined: Jul 10th, '06, 19:49
Location: Rehoboth, Mass.
Contact:

Post by Bob H. »

John, Lookin good, like the slick pipe trick for the rods..BH
1966 31 Bahia Mar #316-512....8 years later..Resolute is now a reality..Builder to Boater..285 hours on the clocks..enjoying every minute..how many days till spring?
User avatar
Dug
Senior Member
Posts: 2256
Joined: Jun 29th, '06, 11:04
Location: Worcester, MA

Post by Dug »

I like the pipe idea for the rods. Thats really cool!
User avatar
Gert van Leest
Senior Member
Posts: 314
Joined: Jan 17th, '11, 16:30
Location: Warmond, NL
Contact:

Post by Gert van Leest »

I like the pipe thing to ! , are you not afraid that the rods will come aft wile you are under way ??
I think a piece of chockcord will be needed.
Good luck !
Women are like boats ,the older they get , the more money and professional help they need to look beautiful.
User avatar
Marlin
Senior Member
Posts: 478
Joined: Sep 1st, '09, 15:50
Location: Palm Beach, FL

Fiberglass advice

Post by Marlin »

Earned my way thru college painting and repairing show cars, after every repair of body work, I would spray out the section with gloss black lacquer, u will see the ripples, kinda like the capts rattle can approach to finding imperfections
User avatar
John F.
Senior Member
Posts: 2101
Joined: Jun 29th, '06, 07:58

Post by John F. »

Marlin or Capt. Pat--

Can you explain the rattle can approach? Iwas going to lay down a light coat of primer once I think I got it. Then I'll go back and fix the stuff I find.
1968 B20 Moppie - Hull # 201-937
1969 B31 FBC - Hull # 315-881 (sold)
1977 B31 FBC - Hull # BERG1652M77J
User avatar
CaptPatrick
Founder/Admin
Posts: 4161
Joined: Jun 7th, '06, 14:25
Location: 834 Scott Dr., LLANO, TX 78643 - 325.248.0809 bertram31@bertram31.com

Post by CaptPatrick »

John,

The technique is called tracing...

The spray can paint of choice is an automotive sandable lacquer primer. (Color is unimportant, but I prefer gray.)

Get a good brand, such as Krylon. Cheap brands usually have crappy spray nozzles and tend to splatter and dribble. You want a good atomization of the paint.

Hold the can about 12" to 24" away from the surface and just mist the paint on. The lacquer primer is almost dry as it hits the surface and has a very weak bond.

When you long board or block the surface, the high/low spots will be reveled by the removal of the primer from the high spots. Either continue sanding to reach the low spots, or build out the low spots with fairing compound as needed.

If you choose to build up the low spots, circle them lightly with a pencil, hand sand the primer trace away and add the fairing.

Repeat the overall process as needed. Once you've reached the degree of perfection you want, rinse the surface, dry, and shoot your final two coats of epoxy primer. A final light sanding with 320 grit and you're ready for top coat.

Br,

Patrick
User avatar
John F.
Senior Member
Posts: 2101
Joined: Jun 29th, '06, 07:58

Post by John F. »

Thanks Capt. Pat.

"degree of perfection" - really?

If anybody is looking for an activity that gets your heart rate up, and later in the day, reveals all the arthritic problem spots in your shoulders and hands, its longboard sanding.
1968 B20 Moppie - Hull # 201-937
1969 B31 FBC - Hull # 315-881 (sold)
1977 B31 FBC - Hull # BERG1652M77J
User avatar
TailhookTom
Senior Member
Posts: 985
Joined: Jul 3rd, '06, 14:12

Post by TailhookTom »

John:

When I longboarded my B31 -- I used bright green and orange (rotated the colors) until I only ended up with the initial 545 grey primer left on the boat. I'm not good at it, I don't have patience, and I hear you on the arthritis and cardio -- therefore, I needed neon to make it more entertaining and easier for a slug like me to get decent level of perfection.

Tom
User avatar
Marlin
Senior Member
Posts: 478
Joined: Sep 1st, '09, 15:50
Location: Palm Beach, FL

Fiberglass repair

Post by Marlin »

Yes on the post sanding , I would suggest to block sand with 150 and identify the voids / scratches ,etc, if u have used 545 , fill shallow imperfections with Awl fair, I have also filled them with a polyester filler by Evercoat,,goes off quick ,re prime, go thru the rattle can proceedure again block sand, if ok spray on the final coat of primer and sand out with 320 ,then follow suggested finish coating procedures, I use Awl craft because it is easily repairable and if u do get a run in a tight corner or wherever u can color sand it out, buff and your okay, always put on the 3 rd color coat , gives a greater build up that allows u to color sand or buff out in years to come, my theory
User avatar
John F.
Senior Member
Posts: 2101
Joined: Jun 29th, '06, 07:58

Post by John F. »

Fair, sand, tracing/prime, fair, sand, tracing/prime, etc. I have both limited understanding of materials and don't have a compressor/gun, so I make do with West Sys. Epoxy and fairing filler, rattle can primer, and Interlux single-part primer. Some progress:

Image

Image

Image
1968 B20 Moppie - Hull # 201-937
1969 B31 FBC - Hull # 315-881 (sold)
1977 B31 FBC - Hull # BERG1652M77J
Post Reply

Who is online

Users browsing this forum: Bing [Bot], Google [Bot] and 45 guests